-
Vintage cocktail for the festive season – Jack Rose

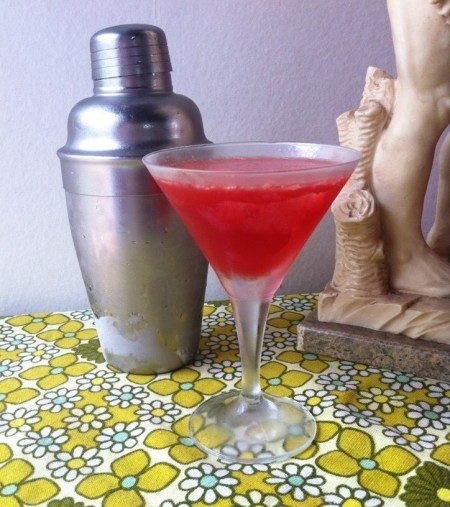
I hope you are enjoying the festive season, for me this is a complex time, and not always as relaxing as I wish! But, I’ve been reflecting on the Summer Solstice, and am looking forward to some long days at the beach and some sneaky sewing days. Here’s a revival of a vintage cocktail that I have enjoyed lately. The Jack Rose, a really pretty little drink with a festive red hue and crisp apple tang, perfect for a summery Christmas.
Place your cocktail glass or glasses in the freezer, and fill your shaker three quarters full with ice.
Then, add:
Two parts Applejack, I used a sour apple schnapps (which is actually not so sour)
One part fresh lime juice
One generous dash of Grenadine.
Shake vigorously, until the shaker is frosty and pour into your chilled glasses. Garnish with a slice of fresh apple if you wish. If you prefer smooth, clear cocktails, strain your lime juice or go for the bottle variety. I use fresh lime juice and occasionally sieve out the pulp, it looks sharp, and crisp, and you’ll have a smooth surface, unlike this one!
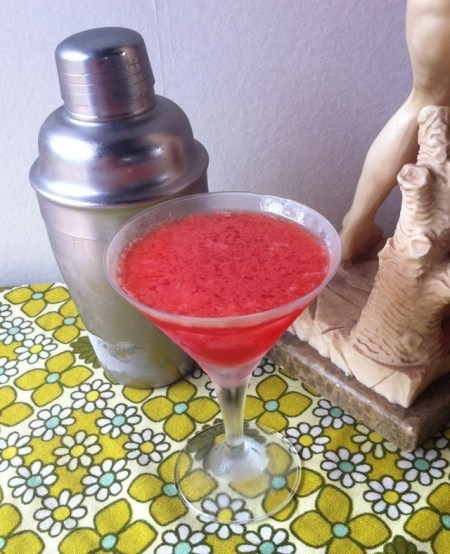
It still tastes good though!
-
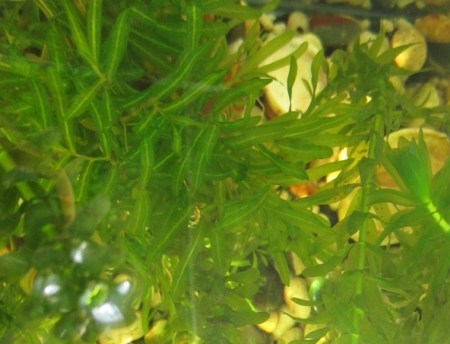
Water plants – setting up a natural aquarium

Luna, Blake and I began an aquarium project about two years ago now, the seasons have come around again, and we have enjoyed looking back on how the activities around this have created a very interesting family project. Initially, I thought the post about setting up an indoor, naturally planted aquarium would be a kind of ’round up’ of what we did, how it went, for those curious about doing the same. But it has been an on going project, and I see it will continue to change, and we’ll have new experiences with the aquarium and its’ in habitants.
That would be life with other living creatures though, wouldn’t it?!

Above: Water plants in a tank at the Auckland Museum.
Establishing a planted aquarium was a natural progression from making Terrariums, and this has become one of our most long running projects, and all the more satisfying as we learned a lot along the way.
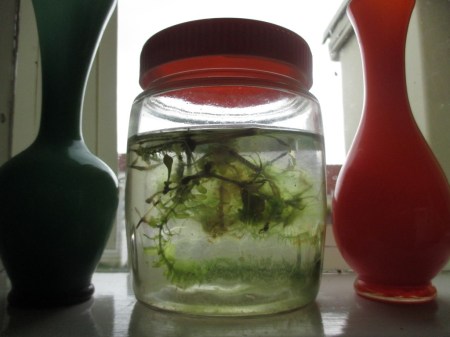
Initially, we collected and placed in a bucket, some water plants, rocks and soil or sediment from a waterway we visited and played in out west. This was spontaneous, but not unrelated to a strong interest in animals and life cycles at play all around us. We found a small tank with rocks at an op shop, so set up a shallow water tank on the back step. It looked a bit like this, kind of murky and muddy, not that exciting, or so we thought, just a few plants and rocks in a tank….
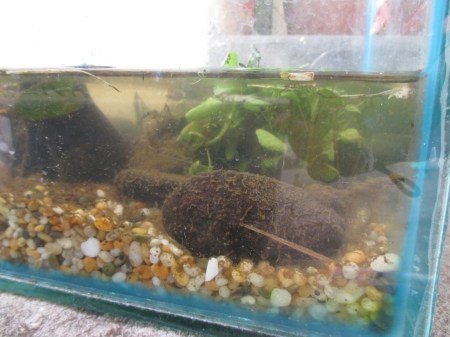
Until we observed that there appeared to be trails in the sediment on the surface of the larger rocks. Something or someone had come home with us! What what or who was making those tracks? We surmised that it must be a water snail as we had seen similar trails in sand at the beach. Of course, we had to see the creature to be sure though, regular checks and investigations were underway. I was curious to see how standing water and plants may fair, my grandparents had (and still have fish) first a big glass bowl and then an outside concrete pond, the fish seemed happy without filters or mechanical means of moving water. We talked about this as we were figuring out what would be the best habit for water animals and plants, and we paid more attention to the water ways and wet environments we came across on our outdoor excursions. At first, the back step seemed like a good place, as we were just starting out, had no pump and nowhere suitable inside to set it up…..but it’s also a thoroughfare, and as it turned out, not the best place, the tank was bumped and cracked in a week… back to square one. We needed a new tank, and though we salvaged as much as we could, we also needed new plants and new mud. Luna decided to save her pocket money to buy a new tank, we scoured op shops, our budget was under $20, we managed to find a good deal on trademe, and after an exchange of $16, Luna had a nice new tank, with clean stones which had been home to an axolotl, hey wouldn’t it be cool to have one of those….? No no! Back to the original plan!
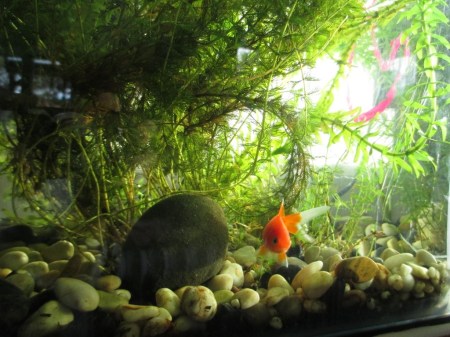
Eventually when we had our new tank installed indoors and we had sourced some new wild water plants we enjoyed once again looking for life. We realised that there must have been water snails or eggs on the plants or in the mud, we discovered these little babies, tiny water snails, only a couple of millimetres in size. We surmized that these little fellas might have been responsible for the tarcks in the mud in our original tank set up.

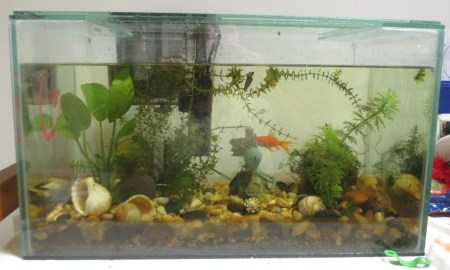
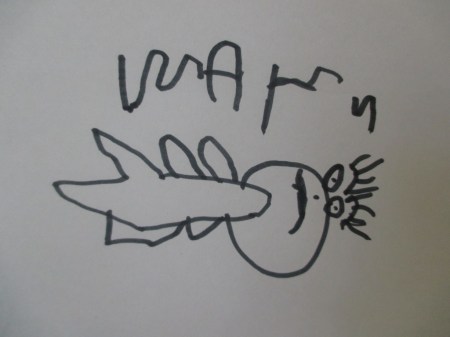
By now we had a clearer idea of what we needed to do, and after more research, we knew what we wanted, and how to care for our tank inhabitants. We had also looked at as many books on freshwater fish, aquariums and how to set up a planted or natural aquarium, we found some youtube clips as well as books on the ‘how to’s’. We were well along the way, and getting close to adding fish to the family. We learnt that a naturally planted aquarium may not have that crystal clear look – the perfect looking tank – that we were more familiar with. A naturally planted tank has sediment, gravel, some soil for the plants to establish themselves (this varies according to the method you go for, the plants and other inhabitants of the tank). We also learnt about the balance necessary for the fish to be healthy, which means ensuring the right amount of plants to animals – including water snails, who also may feast on the plants! We welcomed Mary a comet, and Devon a bronze shubunkin, here’s Luna’s drawing of Mary.
Sadly, Devon, below, who was of a somewhat nervous disposition, did not survive long with us, and we found her floating on the surface, mouth open, after a tank clean (she had also been removed by little hands and placed in a shell during the process…oh dear!) Here is a drawing of her, and a water critter, Elsbrogdoofrug, so named by Blake. Elsbrogdoofrug vanished not long after Mary and Devon arrived, and we suspect he was a tasty snack for one of the fish….

Luna and Blake could be found, seated in front of the tank, just observing, talking to their own fish…looking for other creatures.
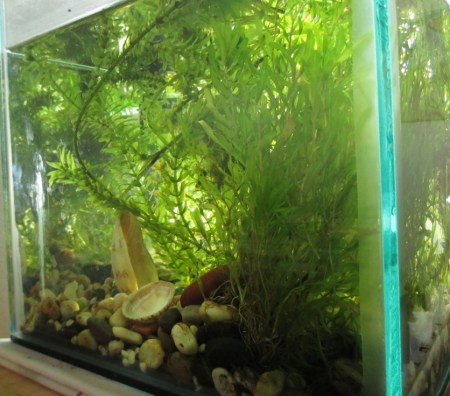
We collected wild specimens of plants, to add to the tank, we would quarantine the plants in jars, with fresh water, letting them acclimatize to the new environment of our house. This provided more opportunities for talking about natural habitats, and how would the plants survive, adapt or change in our wee tank?
Perhaps one of the most exciting aspects of our approach was watching and discovering new creatures appearing, maybe transported to out tank as eggs on plants, or perhaps as tiny animals we didn’t see at first.
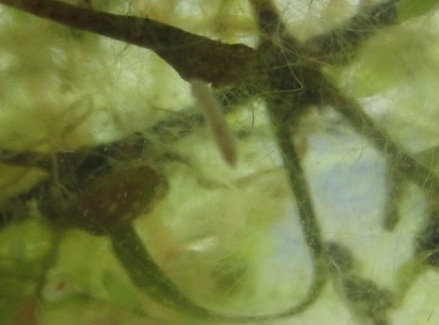
Like this blurry Planaria, or flat worm, it’s in the small jar of water plants we kept on the windowsill for a while, we could spot them in the big tank too, if we looked closely…
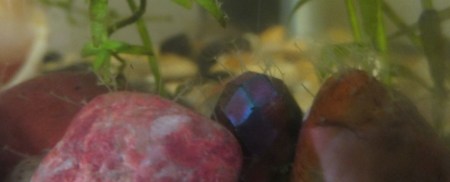
And how exciting it was to discover Hydra colonising the rock and shells in the tank! So many kinds of creatures, so much life, we just needed to look closely… Along with the new life, we also had some difficulties, keeping the tank clean, from little hands mostly. At one point two sweet little toddlers had set themselves up in chairs, with straws to drink from the tank ! But the fish seemed ok…We had to move the tank twice, as we shifted house, so not ideal, but it’s not as hard as it sounds.
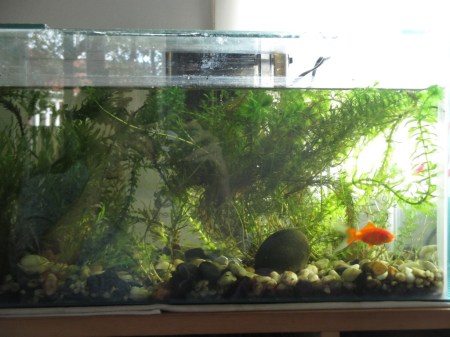
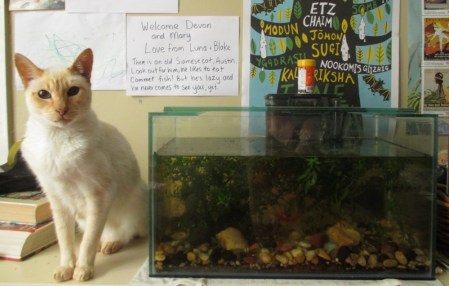
We are onto Mary 2.0 and Devon 3.0, we have had a fish floating on the surface, dead, had a funeral service and burial (in the compost heap, with flowers) we have had a fish simply not-be-in-the-tank anymore. The main suspect was of course Austin the cat. Obviously, we want the animals and plants to thrive, and have a good life, and we think we have got the right set up now, I have a good contact for water plants, we change the filter regularly, I have re-planted and cleaned more times than I care to remember, but it seems like once the balance is established, it’s fairly low maintenance…

One key in setting up a naturally planted aquarium is that plants need sunshine. In the current location, we discovered early one morning, that for about 10 minutes a day, the sunshine coming in across the room in winter hit the tank at just the right angle to produce a stunning, stunning rainbow.

Amazing colours!

Stunning.

Beautiful.

The sun has moved now, so we don’t see this, but we’ll be looking for it next winter…
Other exciting discoveries include, snails suddenly appearing in the tank, finding spawn, likely from water snails deposited on water plants, and often devoured by the fish. We also had a couple dragonflies emerge from the jars of wild water plants we had collected. Dragonflies! That was an exciting day.
Technical and educational stuff about our tank and this project:
Filters; we tried an underwater filter, but it was too powerful and stirred up the soil and kept the small about of sediment swirling around the tank. So we went for a slim waterfall type filter, this gently draws in, filters and returns water to the tank in a trickle, which works well. I also purchase the filter cartridges online, cheaper than I could buy from the pet store, these I replace every two weeks, and give the tank walls and filter itself a minimal clean.
Fish food; one of the goals for our set up is to reduce the amount of feeding the fish required, we wanted to establish a healthy as possible self sustaining habitat. So, we rarely feed the fish commercial fish food, but aim to keep the plants growing healthy, as the Shubunkin and Comet will eat anything! We have introduced captured mosquito larvae (kids loved sifting them out of our grey water tank…)
Plants and keeping the water healthy; any new plants collected wild spent at least a few days in a big glass jar outside with fresh tap water from our home supply and were introduced gradually. I found plants purchased from the local pet store did not do well, unless I was prepared to invest in the more substantial potted plants, they just didn’t live long or settle in the tank. We experimented with cultivating small pieces of oxygen weed in jars on the windowsill – to increase that sunlight – this was mildly successful. But what made the difference was buying some water weed online from someone who grows good specimens in an outside pond. The plants are robust and strong, and they just seemed to keep on growing, we could seem them putting out new roots and growing towards the sun. I am yet to go in-depth into the chemistry of the healthy aquarium, so that will be a future exploration…
Books and research; we borrowed a whole heap of books from our library over several months, on all kinds of aquaria, we visit the local pet store and enjoy looking at the other animals often. We found some interesting wild, freshwater parks where we could observe the natural (as possible, being urban) environment, we also look at aquaria at the local museum too.
Community and relationships; we talked with the staff at pet shops about our plans, and our librarians, Luna and Blake have been friendly with some staff at a public garden we frequent and learnt about the fish they care for too.
Additional educational aspects of this project; we learned more about rainbows, and how prisms work, and have bigger dreams about out door water gardens (maybe one day…) The ‘successes’; such as plants growing well and other life appearing, as well as the ‘failures’, plants not establishing themselves and fishes dying/disappearing provided opportunities for analysing our set up, and empathy with the animals. Particularly in avoiding stress, while cleaning, and moving them, and our goal of respectfully caring for captive animals…yet another conversation! As I encouraged Luna in particular to save up for her fish and the new tank, budgeting and saving was also a consideration. Luna bought Blake’s fish for him with her pocket money savings, which was really heartening to see.
-
New and improved vegan Kimchi recipe!
I first wrote about homemade vegan kimchi, way back here in 2012. For sometime, I have known I need to update the blog with my current, new and improved kimchi recipe, so here it is!
Since I started making my own kimchi, I have made some tweaks and refined the recipe, I also found some additional tips and tricks. My recipe is adapted from a traditional Korean method, the key changes I made are in the ingredients, in order to make a vegan version, and in the extra time I allow for fermentation. Don’t let the time involved put you off, the actual time in the hands on making is very short, it’s the pickling and fermenting which takes time, and that just happens quietly on the bench. Life is busy, and the time frames in this recipe are actually very flexible, if you think you cannot keep on track, don’t panic! I have found ways to avoid losing the whole batch when I have had to delay a step, just read on and I’ll include these tips along the way.
So, without delay, here’s what you’ll need:
Time:
The basic process involves washing and chopping veges then leaving them to salt pickle, which can take between 1 -3 days, followed by making the spice sauce and combining it with the veges, and allowing to ferment, this may take a further 3 – 5 days.
Ingredients:
My recipe uses one large daikon radish, two large wong bok cabbages, sea salt, approximately half a cup, one head of garlic, two large, thumb size chunks of ginger root, a teaspoon dried chilli flakes, 2-4 large juicy lemons and a half a cup of tamari soy sauce. Feel free to experiment with the spices, omit the chilli if you dare, or up garlic or ginger…play around until you find a flavour you like.
Equipment:
I use two litre pyrex jugs (one or two for big batches) for the salt pickling process, with plates to cover, a blender to make the spicy sauce, and clean glass jars to ferment and store, you’ll need tongs (or fingers) to mix and something like a wooden spoon or pestle, to press into the jars to remove air bubbles. You can use large ceramic bowls for pickling, as long as they allow for air flow.
Step one, the salt pickling method…
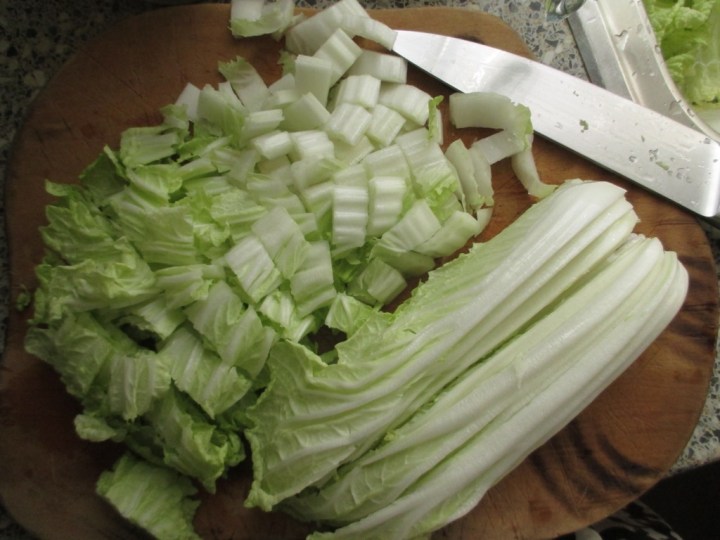
Wash and prepare your veges, the diakon and wong bok, ensure that the veges are as fresh as you can manage, there are no signs of spoiling, I don’t worry much about holes, but remove any brown edges and discard any rotten outer or inner leaves. You wont want to risk wasting a batch over a bad cabbage leaf or two! Trust me.
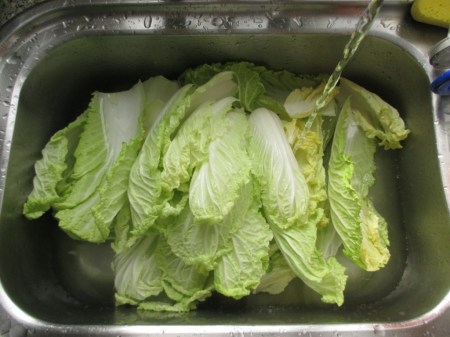
I wash and leave the wong bok in the sink while I peel and slice the daikon.

These photos demonstrate how I like to chop my veges, I like them close to bite size, but it’s up to you really.

The thing to remember is, some veges will take on the salt and flavour faster than others, for consistency I like my veges around the same size. The wong bok wilts and becomes salty faster than the denser more substantial daikon, which I then prefer thinly sliced.
When I was learning how to understand this part of the process and when it was complete, my Korean friend described the salt as ‘killing’ the cabbage, it does this by stripping water out of the vege (daikon too) and imparting it with a lovely saltiness…
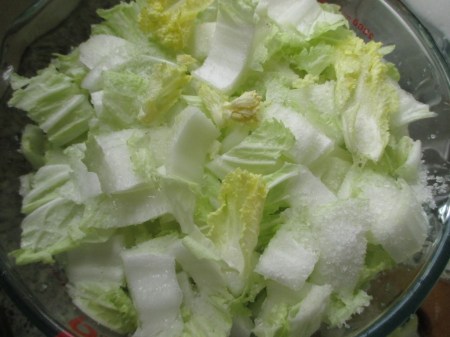
I add a layer of chopped vege in the bottom of my jug or bowl, then sprinkle as evenly as you can with sea salt, it probably takes about 1/4 to 1/2 teaspoon of salt over each layer, this depends on the coarseness of the salt and depth of the layer. I usually fill two two litre jugs with this, and as you’ll observe, the pickling reduces down the veges and produces a brine in the bottom.

Next, I cover the jugs with a plate, mainly to keep anything from falling in, but allow air flow, and leave it on my bench out of the sun for 1 – 3 days. You will want to keep an eye on this if the weather is warmer, as it may spoil if it gets too hot for too long. The best way to check is just take a look, have a taste (rinse it first, as it will be very salty). You see the level of veges drops down and brine collects at the bottom, just leave it, the brine is good, and we don’t want the veges drying out.
Now, if some unforeseen event happens and you simply cannot move onto the next step within the 1 – 3 day period, all is not lost! I have had great success by putting the salting veges in jugs as they are, in the refrigerator until I can come back to them, I have only left them four days, maximum, so that will give you a ball park to work with. This slows down the process enough to buy you some time, this is also good if you realised you have used the lemons in your Gin and Tonic!
The next step: Washing veges and making the spicy sauce.
The easiest method I have found is to take the jugs of salty, wilted veges, and fill them with fresh water, let them sit for a bit in water while you begin to prepare the spicy sauce. Pause in the sauce making process periodically to drain and re-rinse the veges using a colander in your sink.
When I began making kimchi, I hand chopped the garlic and ginger, but I find using a blender is faster and incorporates all the flavours of the spices really well, so if you have one, use it, if using a bowl, simply combine the following and mix well.
Peel the ginger and garlic cloves, place in blender with the zest of the lemons, and a teaspoon of chilli flakes, pour juice of lemons into a measuring jug, I usually aim for about 1/3 to 1/2 of lemon juice, then add Tamari to top it up to one full cup of liquid. This is approximate. Add the lemon and tamari to the garlic, ginger and chilli in the blender and set it on a medium speed to throughly chop and combine.
While the blender is on, come back to the veges. I wash and squeeze out the salty water from the veges about 3 times, tasting occasionally to gauge flavour. If you have not already, tip the veges into a colander, and with the water running, take handfuls, rinse and squeeze them out in your hands, you want to remove most of the salt water, have a taste as you want to retain the salt flavour though, so don’t go too far with the rinsing, return the veges to the now clean jug or a bowl large enough to mix the whole batch.
When that is complete, pour the spicy sauce over the veges and mix well, you can use your hands, but all that chilli and lemon is a bit of a killer if you have any small cuts on your fingers! I use tongs to grab and turn to mix, it might look a bit like this:
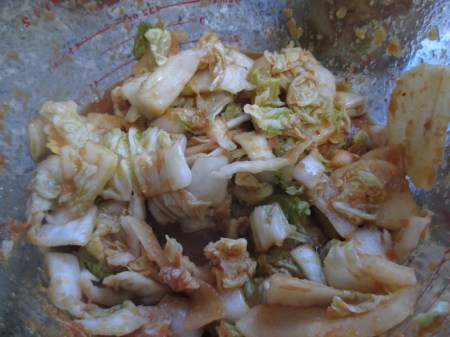
Perhaps not that appealing…but it will taste great already!

Now, take the clean jars, I pour just boiled water over the lids and into the jars before I fill them. When they are cool enough to handle I pack the jars, using tongs, then I use my wooden pestle to press the veges down, letting excess air escape. Start this when the jars are about half full as the liquid may overflow.

My recipe makes enough to fill one or two large jars, about 700ml size, plus a smaller jam jar (this is the one to give away to friends) and there is usually plenty of liquid to cover the veges well. Ideally for the fermentation process to go well, you want to have any veges covered with liquid, I find bits and pieces always float to the surface, and it is fine, so I just do my best to press out any air bubbles, and cover with the juicy spicy liquid.

Next, tighten lids, and rinse off the outsides of the jars, then dry, loosen lids, you want to allow air flow, but keep the kimchi covered, and place the jars on the bench out of the sun to ferment for 3 – 5 days.

You can eat it straightaway, try some now! Then check in each day if you like to see how the flavour changes, and refrigerate when ready. If I’m all out of the last batch, I’ll have a jar fermenting which we use daily on the bench (just remember to use a clean utensil).
What can you do with your kimchi? How do you incorporate with a meal?
We use it as an everyday condiment, it is great with rice, soups, eggs, salads, just experiment with the flavours. You can use the juice for kimchi fried rice, or to add a bit of spice to a vege soup with noodles. Steam broccoli, bok choi, cauliflower to eat with kimchi with your meal.
If there is excess juice, keep it, drink it, use it in cooking. You can add the spicy sauce/juice from a previous batch to a new one, however, I find each batch is different, and keep the various jars going rather than making an homogenous mix.
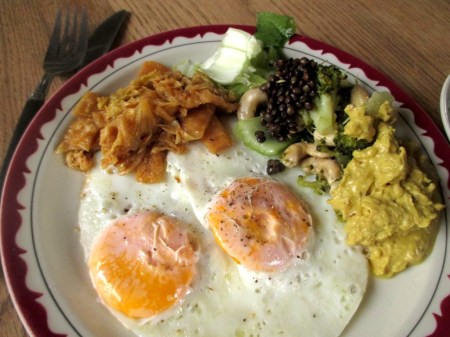
My favourite way to eat kimchi, is with eggs for breakfast or brunch, like this:
Enjoy! Any questions? Please comment below.
-
Butterick 7653 – complete!

I started this dressmaking project in 2013, ages ago, one of my first ventures into toile making and up-sizing the pattern from a 32″ to 36″ bust. I have worked with 34″ patterns, and am comfortable with adding or removing a centimeter here and there, but this was a newer shape to work with, the lovely high cowl neck, with the pattern piece cut on the bias.

Other than working out the up sizing, a very straightforward dress. It sat in the ‘to sew’ pile for way too long….and this is a project pile busting year for me.

More often than not I work with thrifted or de-stashed fabrics, rather than buying the prescribed length, which usually requires a bit of creative laying up! I had just enough for the slim skirted version.

Check out these fancy pleats, simple and easy to create,

The fabric is a polyester with white spots, it was really slippery to work with and one of the shoulders is slightly off grain, but manages to work ok.

I think this turned into a really a gorgeous dress, and very wearable. I actually made the other fuller skirted version too, just need to hem it.

Sorry about the crazy 80s bad hair! I am channeling a less refined Sean Young from Bladerunner….honest, just until I can get a good cut.
-
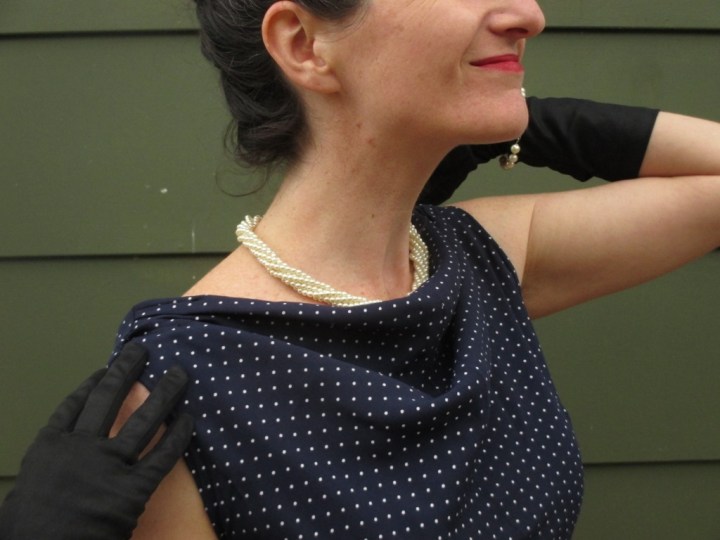
Butterick 2137 60s summer frock

Vintage Butterick 2137 in a 60s floral print…perfect for summer!

Yet another unfinished-project-busting Vintage Pattern Pledge dress… I have made a winter version of this dress in a black~charcoal plaid wool, ages ago, which is a favourite in the cooler months. When mum pulled out this fabulous piece of vintage cotton from the Nana Stash, I was inspired. Austin, not so much.
Here’s the original pattern.

The pattern is easy to work with, the fabric was less than two metres, about one and a half, so a lot of time went into the final pattern lay out. While there was enough for the main pieces, I was short facings, which I cut out from some plain white cotton, and gave the skirt a false hem, using a strip of white bias binding.

Please excuse the *slightly* wild hair, but look at my nana’s earrings!
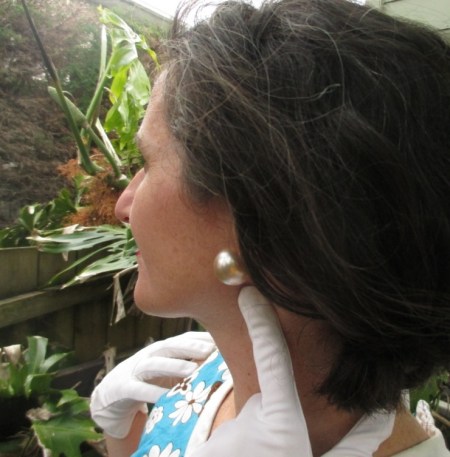
This is fun to accessorise.
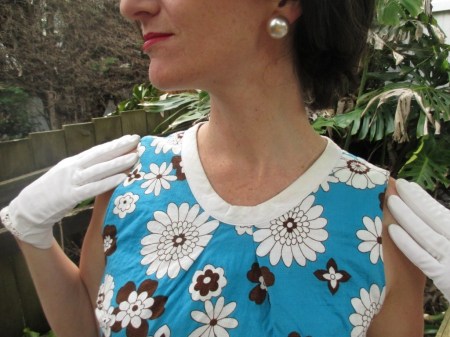
You might notice the neckline is quite different to that on the original pattern, which was a wide bateau, with or without an equally wide collar.
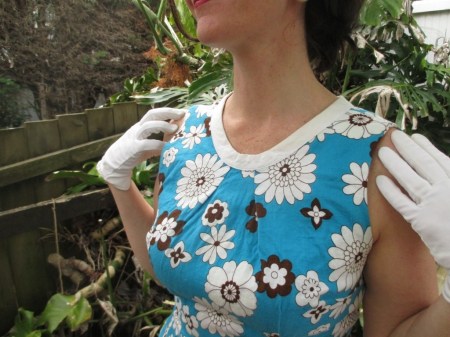
I had some trouble with getting a good fit for this neck line, I only really need to make one adjustment to patterns, and that is the hollow bust adjustment. When I started this, it was not enough to worry about, but I was reminded, my body changes over time, so I need to re-assess when re-working a familiar pattern like this.

My solution to this involved making two symmetrical pleats near the center, which became a “stylish design feature” of this version of the dress. I did nearly tear my hair out, as the more a played around with it, the more it distorted the fabric, exacerbating the problem…argh.
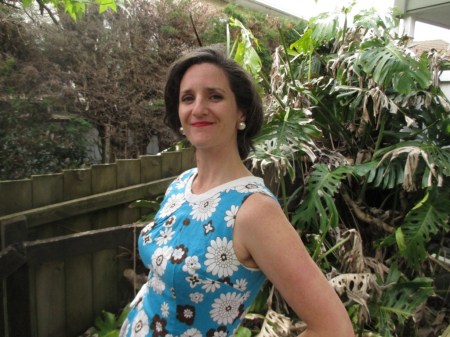
I love this dress! And I think I saved it! Thank goodness, I don’t think I’d ever come across fabric like this again.

-
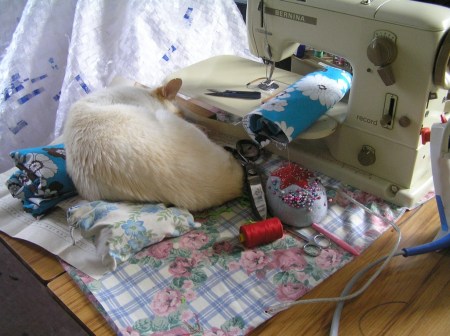
What’s going on? Real Modern Reading and Sewing projects on the go.
The blog has been a bit quietly lately, I have been doing a lot of sewing, happily, just not the projects I keep on thinking about tackling, I have sewn up some clothes for Luna and Blake, and finished some everyday separates for myself and attempted a little sewing room clearing out…
In other news, I was very excited this week to win a copy of this fabulous book, Real Modern, Everyday New Zealand in the 1950s and 1960s, by Bronwyn Labrum from Te Papa Museum (Thank you thank you!) I have been secretly waiting for this book to be published for some time. At the Costume and Textile Association of New Zealand’s 2014 Symposium, Bronwyn Labrum presented a paper that was a bit of a taster of the work she has done in producing this book, examining the meanings we associate with everyday domestic textiles and objects, it was fascinating, and I wanted more!

I am enjoying the book already, and have of course, loved all the photos and illustrations throughout, here’s a little taster..
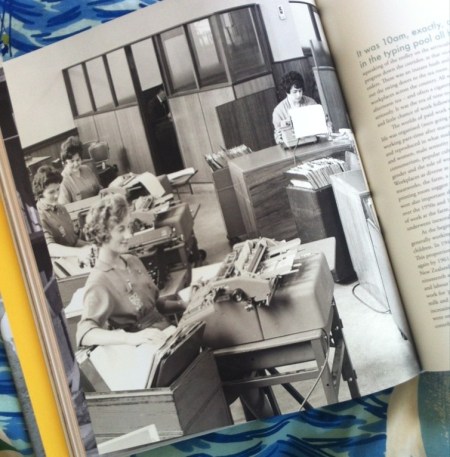
Women at work..

Leisure and lifestyle.
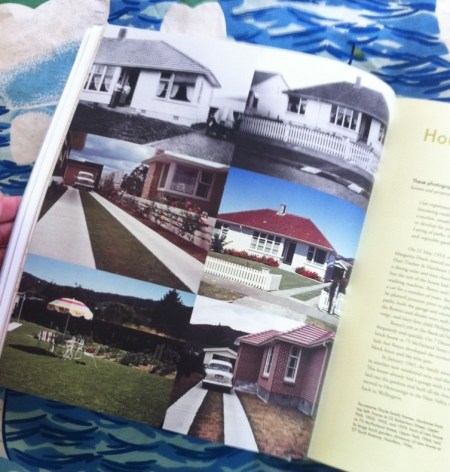
The iconic State house.
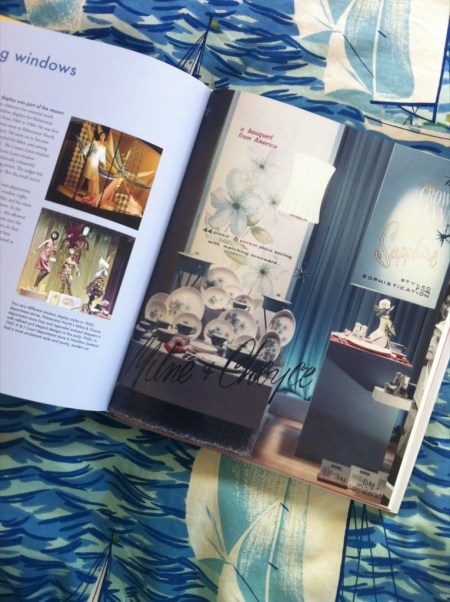
Homewares…
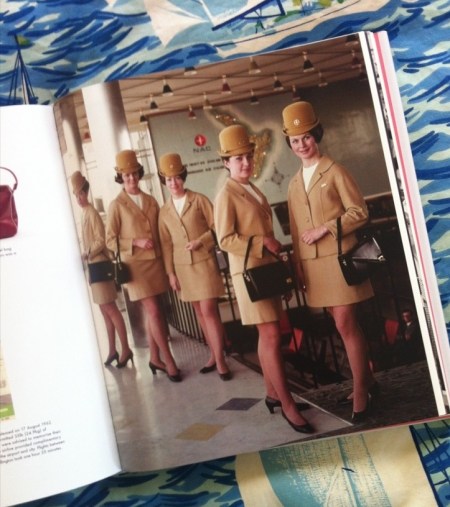
Flight Attendants, of course.
I’ll be reviewing this book in the next few weeks, but, if what I have read so far is anything to go by you ought to have it on your Christmas list.
On the sewing project front, I have a couple of garments that have been gnawing away at me…some have been put off due to shifting house – argh – twice this year – and loosing my sewing mojo, others I have had genuine challenges in making!

This Vogue 1195 is *almost* done, pending final fitting tweaks, buttons and hem (yes, ok that’s a lot left to do…but I’m trying to be upbeat about it!)

Everything lines up, finally, I needed to reach this stage before final the ‘button’ decision..

Purple buttons? No, self fabric.

….Just smaller than those ones, above! See, even longer getting the perfect buttons for this dress. I’m still a bit intimidated by this dress!
Vogue 273, a really lovely 1940s Noir frock is on the back-burner after an ‘accident’ with a child and my scissors (the child is fine, the dress, not so much).

That’s about all I’ll say just now.

Other than, it’s just so pretty, and I can’t wait to finish it.

Here’s to some sewing time, and good reading! I am hoping to get these two dresses complete by the end of the year, as I planned for the Vintage Sewing Pattern Challenge, which I hope you have been following, if not participating. Marie at A Stitching Odyssey is hosting the fun times, and if you need some inspiration, go and have a look at the latest pattern stash interview…
-
The Solar System Project

I had been planning a Solar System Project for sometime, we just needed a several days or a weekend when we could easily have the table covered in drying planets and not much else in the way of activities lined up. That weekend came during the school holidays when we also had warmer weather and could dine alfresco.
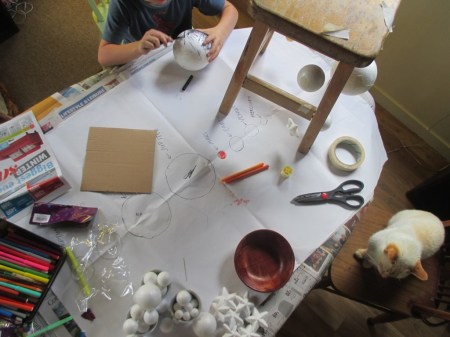
I was also waiting until Luna and Blake could get into the idea, and had the enthusiasm and interest to stick to it long enough!
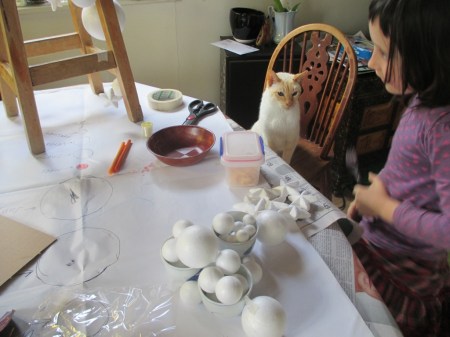
Over the years we have read and learned about the Solar System and space, Luna and Blake have loved visiting the local Planetarium, seeing the planets and solar system models there, along with rockets and space shuttles. So, we went to the local arts and crafts supply store and bought a range of polystyrene balls, they had a great selection and we were able to find everything we needed.
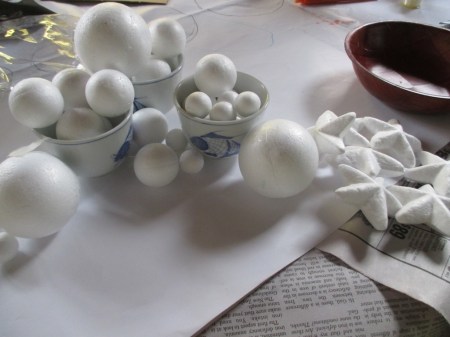
We were not going for a precise scale model, but more of an idea of the size of planets, and understanding their relationships to each other and the Sun and other stars. Luna was really keen on the star shape decorations too.
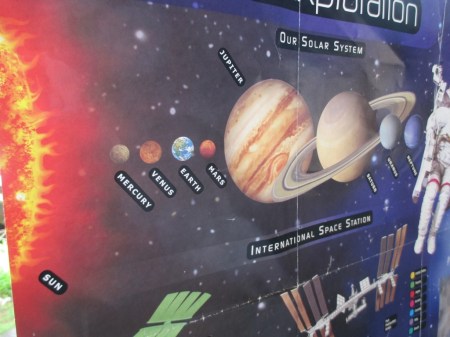
Luna grabbed this Space Exploration poster they have had in the bedroom for years, and we put it up while were working. Good idea Luna!

We had a large sheet of white paper which we used to make a map of the planets, talk about the various sizes, and work out who wanted to paint what.
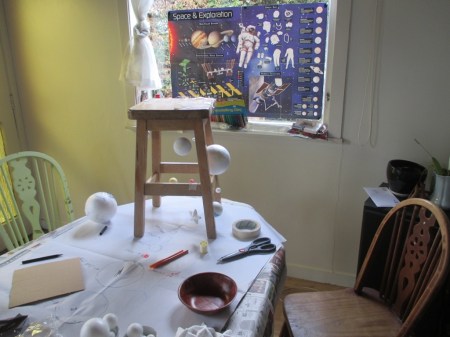
In order to paint the spheres (and reduce the risk of wet paint being splattered around by rolling escapee planets) using a long needle, I threaded nylon through the polystyrene balls and taped them to our small stool. I made the nylon the length I intended to hang them, so they would be all set to hang when dry.
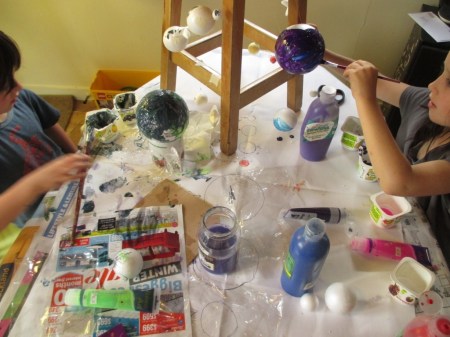
Blake didn’t want to hang his so I propped it up using his favourite mug covered in plastic wrap. Blake also decided he was making a second Saturn, instead of Jupiter, as planned….and he also invented his own colours. Hey, we can be flexible about our interpretation after all…
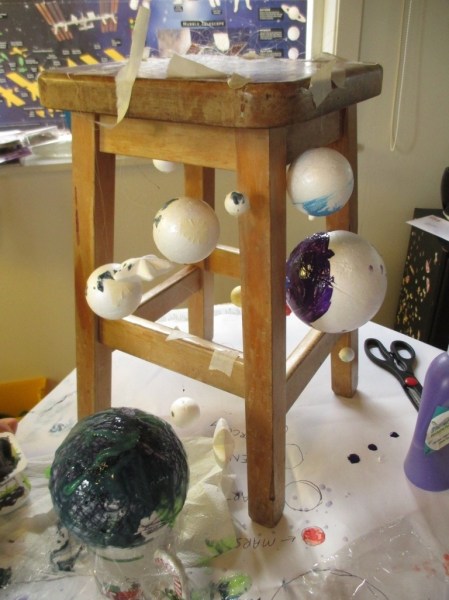
The stool worked really well! To make Saturn’s rings, we traced around a dinner plate onto corrugated cardboard, and using toothpicks pushed, first into the planet, and then the gaps in the cardboard, it took a bit of maneuvering to get the desired effect, and it worked well.
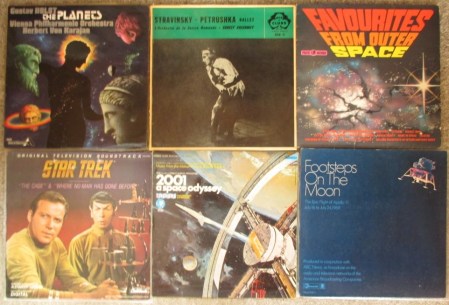
We needed music! So I made a selection of space themed records to accompany the project days….
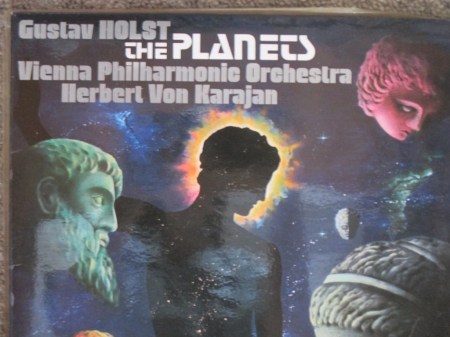
Holst’s The Planets is great, setting a mood, or personality for the celestial bodies.

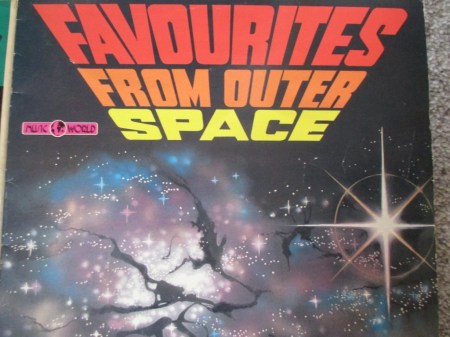
Luna and Blake love 2001 a Space Odyssey, so we had to include it…Favourites From Outer Space was a bit of fun too.
We borrowed this from our library, and while we have seen a few good Space documentaries, Orbit was excellent!
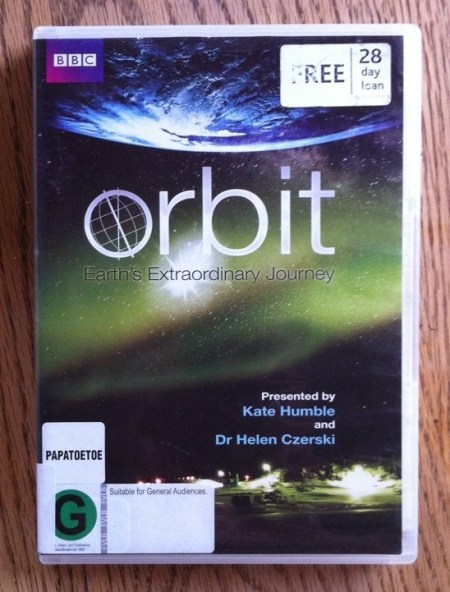
Covering the importance of the Earth’s tilt, the gravitational effect of the Sun and our Moon, the history of our planet in the solar system, the ages of ice, higher and lower sea levels, the Jet Stream, tidal movements, wind and water patterns created by our spinning planet.. heaps of relevant and interesting information, visiting different countries, and climates, and, the scientists who present it are Kate Humble and Dr Helen Czerski, win win! Hooray for women in science!
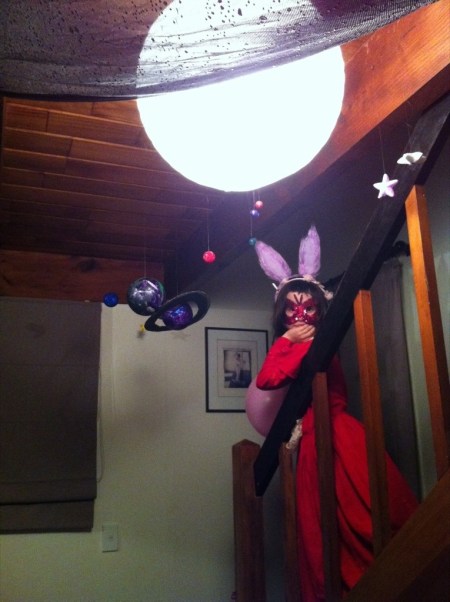
We hung our solar system near our stairs, we have large paper lampshades, which make the perfect ‘sun’ for the model. We had additional planets and stars and so we created clusters of other planets in the room, to remind us that ours is only one of millions of other planets in existence.
Lots of spacey fun was had by all!
-
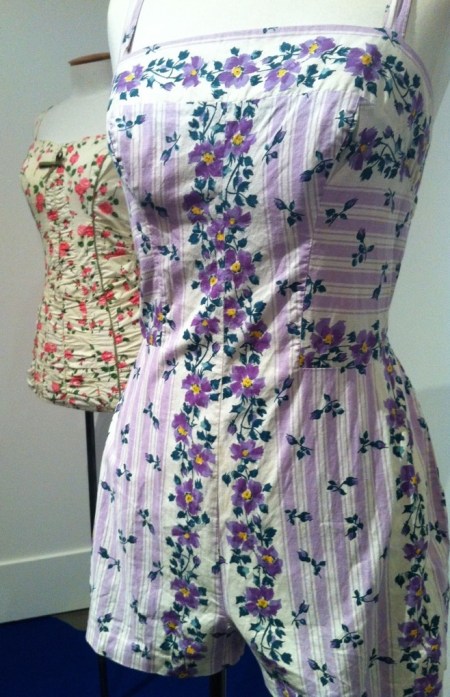
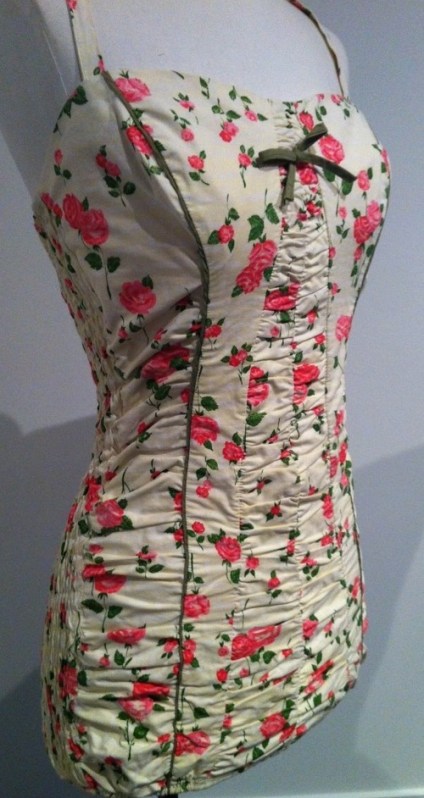
At The Beach, 100 years of summer fashion in New Zealand


New Zealand Fashion Museum have been busy again, I was at the Maritime Museum with friends and children for a Ports Excursion and Blake and I had a wander through At The Beach, 100 years of Summer Fashion while Luna was absorbed in a documentary about a shipwreck….
We didn’t meander, more of a fly around, finding favourites, admire bathing caps and promise to return, ‘Bringing dad’, Blake decided. Here are our highlights.

Those turbans and sunnies!

Floral bathing caps, yes please!!
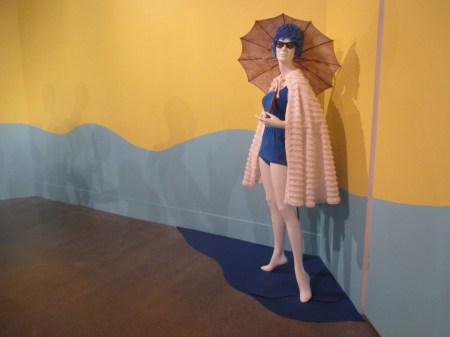
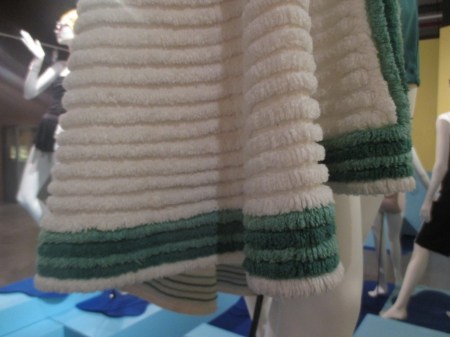
So elegant, great to see some toweling beach robes.
There were quite a few old photo reproductions adding more personal stories, it was interesting to see just how colourful swimwear was, old black and white photos tend to influence perceptions of life, I think, so it was great to have this juxtaposition happening throughout.

The forties section was my favourite.

Check out those playsuits! And some early women’s swimwear…
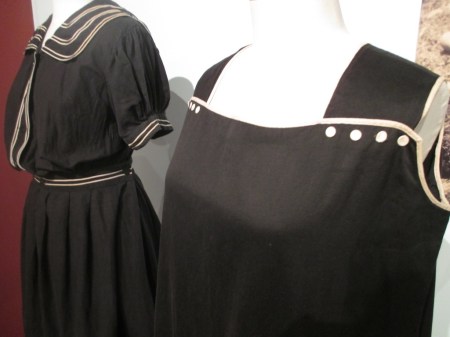
Charming, but I am glad I’m not wearing a dress to swim these days.
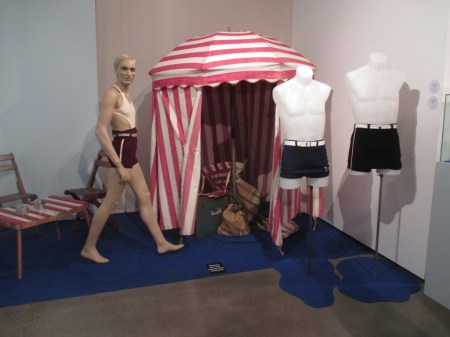
Lets not forget the menswear….

Button up.
There are a few very pretty 50s swimsuits.
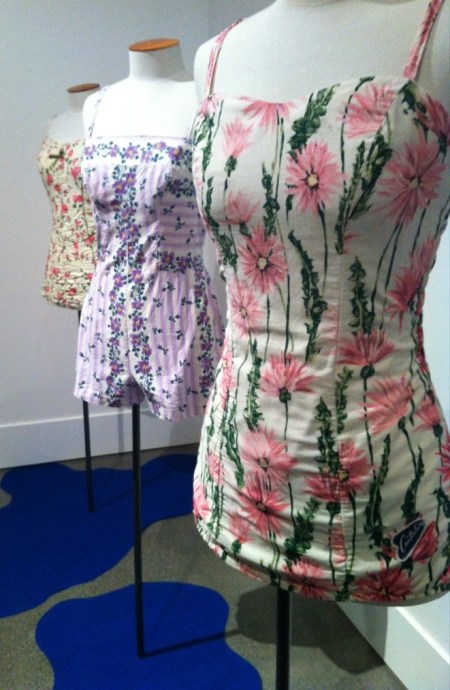
So, so, pretty.
It took a lot of self control not to touch these!
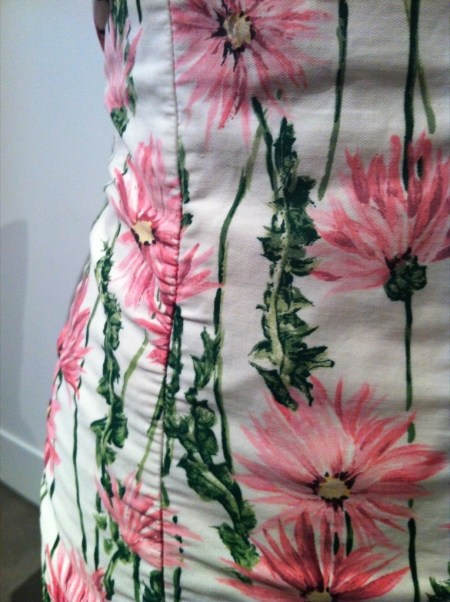
Such vibrant colours.
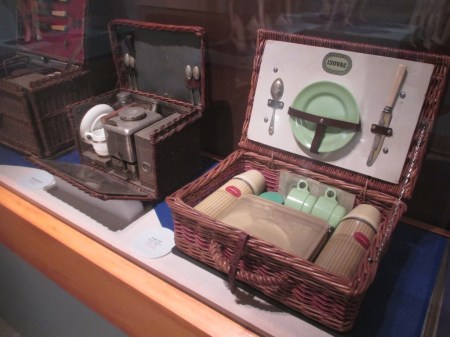
It’s not really a history of Summer Fashion, without some lovely picnic sets, is it?
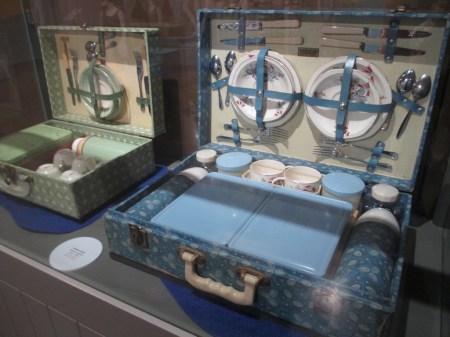
These were such fun!
I can’t wait to go back, this exhibition is on until the 18th of February, so plenty of time, for multiple visits!
-
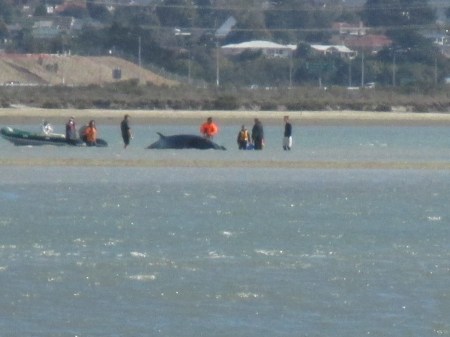
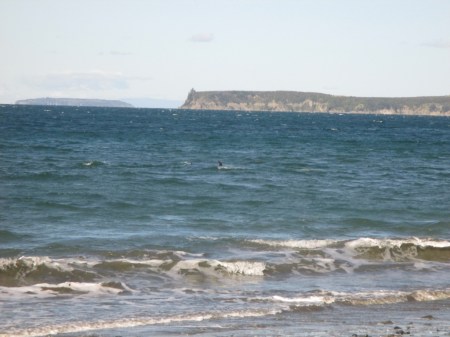
The beached whale
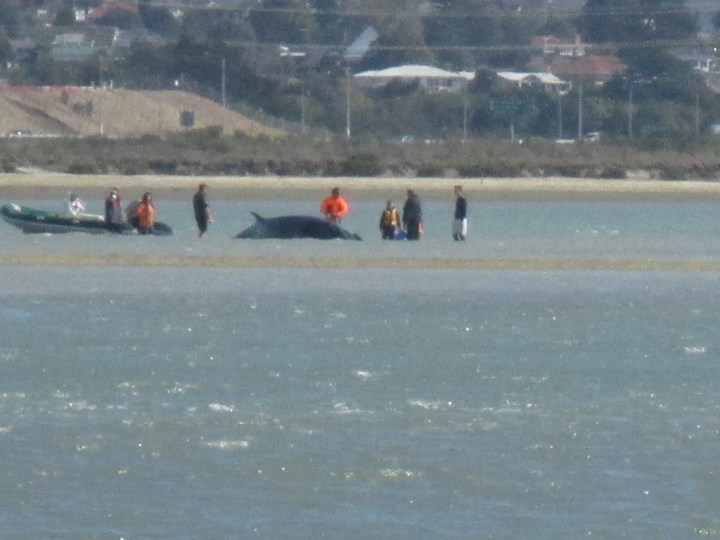
With children free during the day we can have some exciting spontaneous adventures, we have a degree of flexibility during the week as well as regular group activities and workshops. So when something really unusual or exciting comes up, we seize the moment!
So when we heard on the radio that there was a beached whale at our usually quiet and calm local beach, we jumped in the car to see what was going on!
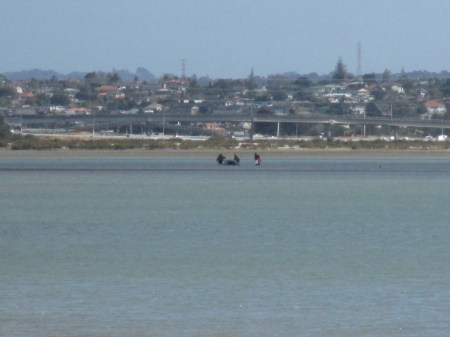
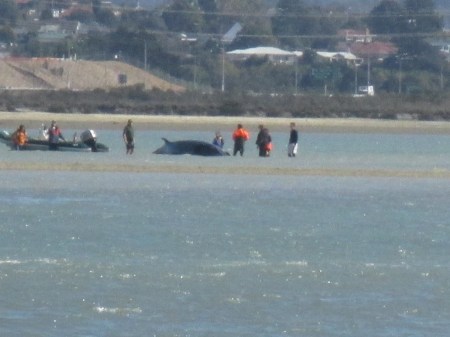
These photos are taken from a distance, as the tide was coming in, and there were safety concerns around spectators getting too close to the distressed animal, or even in strife in the water.

We arrived at the beach to see quite a group of people gathered, Project Jonah was at hand and their crew of rescuers were busy with the animal and talking with public such as ourselves.
That was cool! We had a lot to talk about at home, I pulled out our books on whales and sea mammals and learned more about our relationship with some of our largest mammalian relatives.
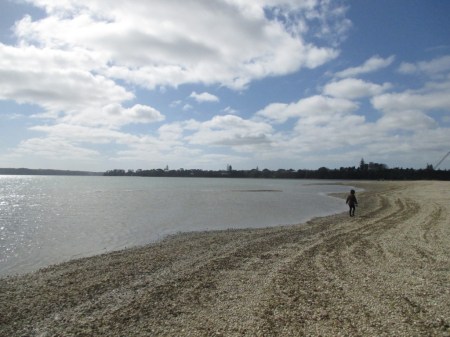
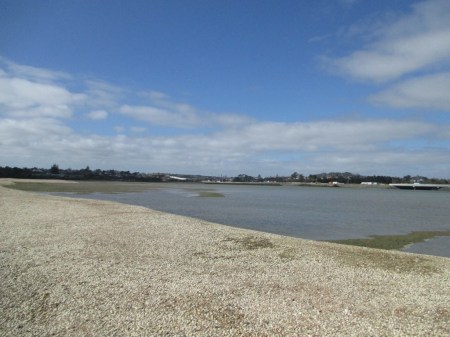
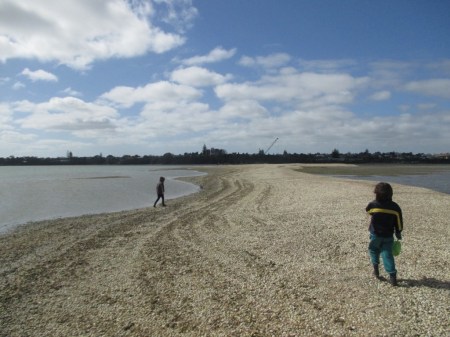
We loved being out on the sand, looking at the shells, and speculating about what happened to the whale, how it go there…
Blake had armed himself with his watering can, you know, ‘just in case’ they needed help….Sweetness.
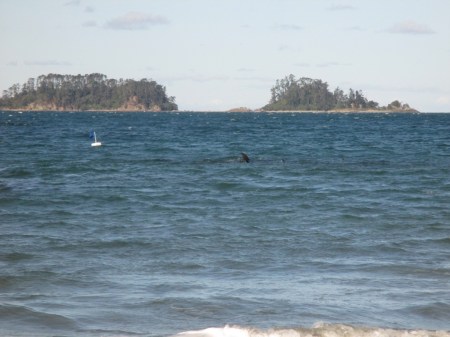
It was not that long ago that Luna and I ran down the sand at Martin’s Bay (one of our other haunts) following some dolphins.One of those days at the beach, for a play and some fresh air, so this was an unexpected gift. These wild animals were literally only meters from the waters edge. Wonderful.
Special days.
2015 has been a big year for me with my two little ones, in reflecting on what I hope to give them, as far as time and experiences go, and for me, some of the challenges I faced affirmed my values, and where my heart is. I had a reminder of the importance of outdoors and wild play, real experiences, and valuing our place in the wider ecology of our environment.
I treasure these memories and moments.
-
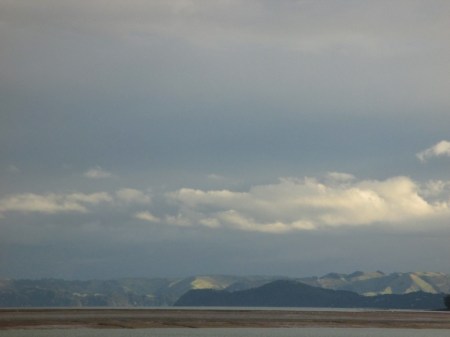
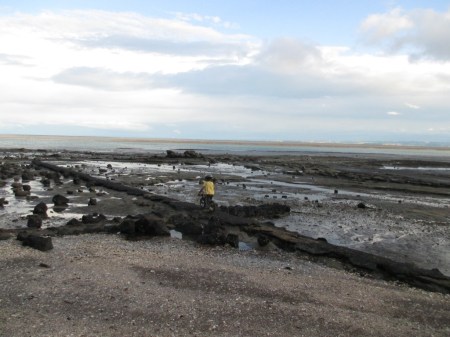
Bay wild play

We have some very special wild places around us in Auckland.
The bike that goes everywhere Blake does.
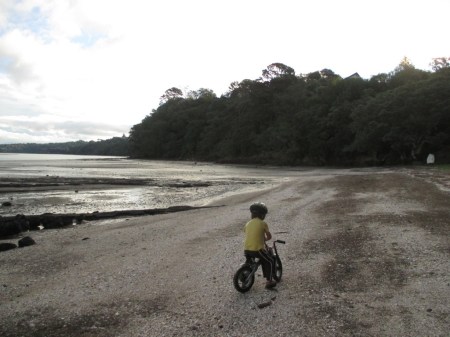
Over sand and rocks.
Blake riding his bike over a cemented pipe.

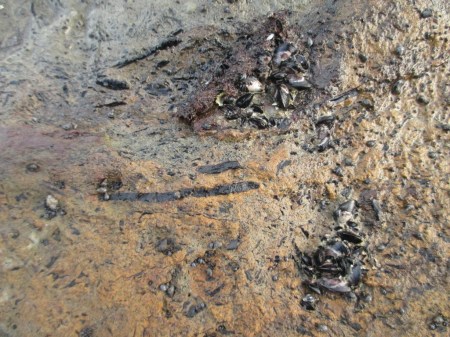
Looking for life in rock pools.
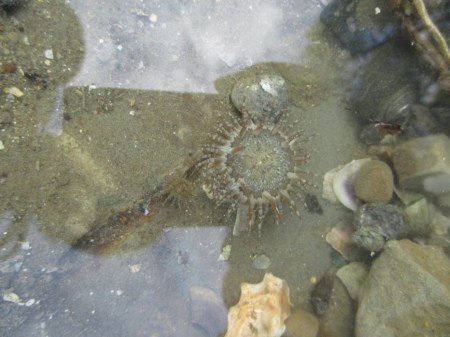
Anemones.
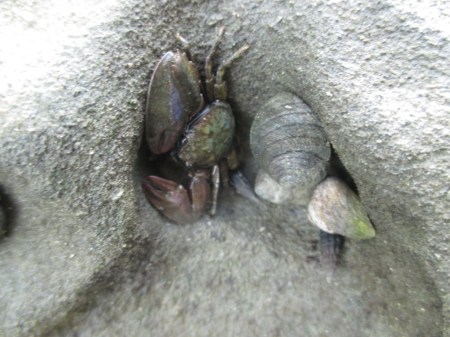
Crabs.

Looking for fossils and imagining the past.
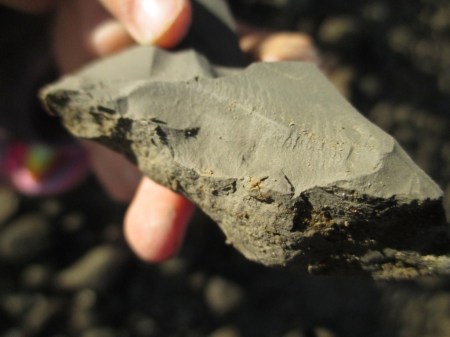
And what are these? Trace fossils? A buried forest?
We come to places like this when we know we need the space above and around us.
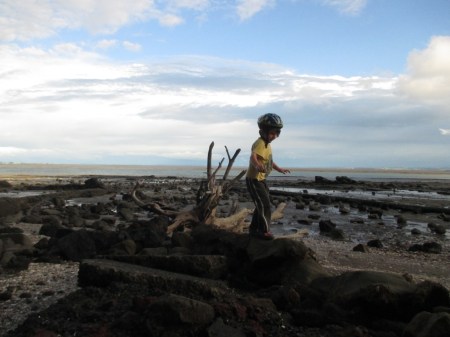
When life feels stressful, when we need peace this is where we go, I’m grateful to have these spaces. Do you have favourite wild places that keep you centered?
artist, writer, curator, mentor


