-
Mad Men inspired cocktails part two, the Harpoon.
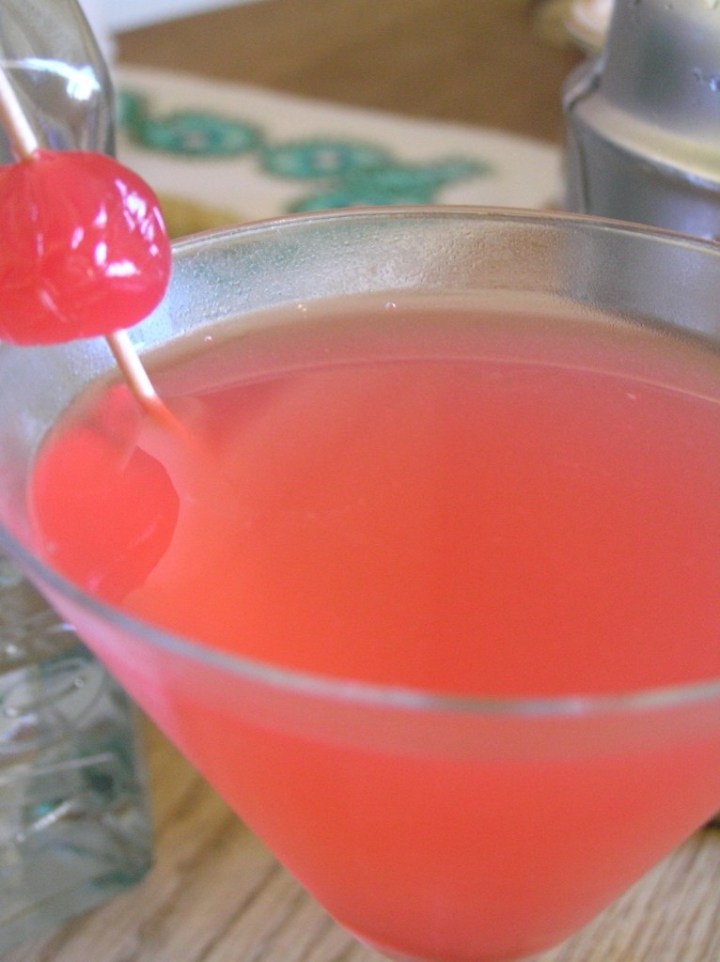

… More on cocktails, here’s the vibrant looking Harpoon
1 shot vodka
1 shot orange liqueur
1/2 shot lime juice
Dash of cranberry juice
Slice of lime and a cherry to garnishDrop the dash of cranberry juice in the martini glass. Pour liquors and lime juice over cracked ice into mixing glass or shaker. Shake briskly and pour into martini glass. Add slice of lime or cherry to garnish. Tasty!

-
Mad Men inspired cocktails part one, the Brandy Alexander.

I’m planning a bit of birthday fun this year, and am having a blast putting together a Mad Men themed cocktail party. Eeek, I’m really excited! The last cocktail party I hosted was a Breakfast at Tiffany’s film screening party, SO much fun.

It’s been a long time since I’ve made or indulged in a cocktail, and I the least I can do, through the week ahead, is refresh myself on the basics, and have some fun. I’m not such a big drinker, but making cocktails is a pleasure, beautifully hand crafted lovely drinks, and everything tastes better in a cocktail glass.
Thought I’d share a couple of the drinks, here is the Brandy Alexander, which is basically a handmade Baileys in a pretty glass… You may recall from Mad Men, this was a drink of choice for Peggy.

Brandy Alexander
One part cream
One part brandy
One part crème de cacao
Nutmeg to garnishPour the liquors and cream into a mixing glass or shaker half full of ice. Shake and pour in martini glass. Garnish with a sprinkle of nutmeg on top.

A couple of tips, I keep my glasses chilled in the freezer, along with my shaker, and extra ice. I write this recipe in ‘parts’ as you might have different size glasses to fill (I have a couple of different cocktail glasses that I use) and it is a bit of a crowd pleaser, so you may want to play around with it!
As a variation, a few dashes of Angostura bitters is nice to garnish, and cinnamon is also a nice alternative to nutmeg.
Next up… the Harpoon!
-
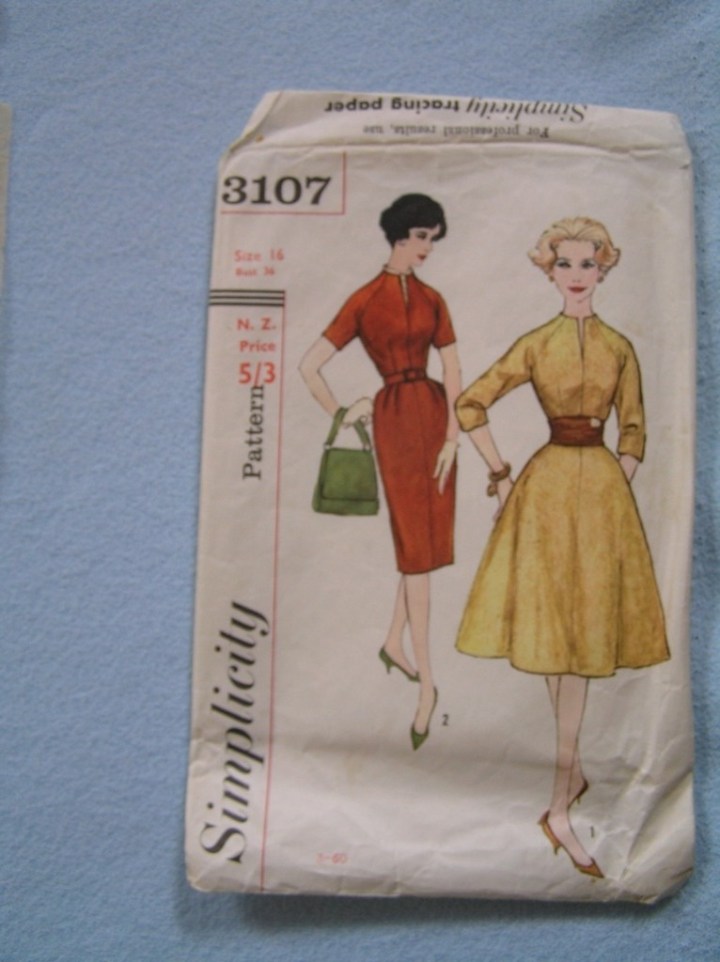
Simplicity 3107 in red, and the saga unfolds…
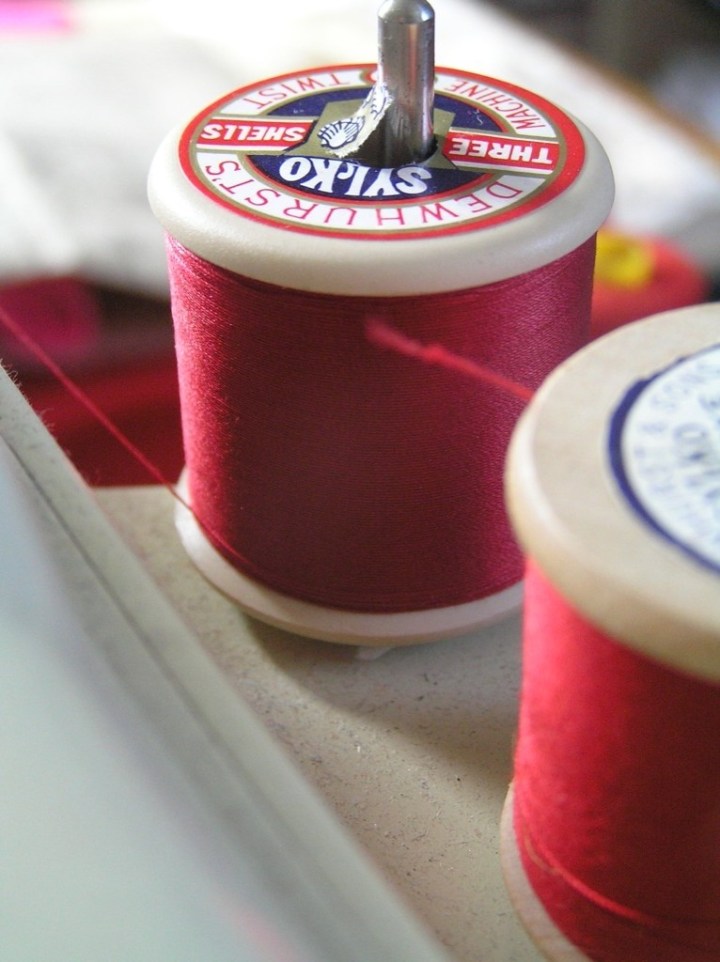

Luna and I have had a great time with Red in the sewing room lately. I picked up just over two meters of what seems like a synthetic satiny type fabric, and decided I’d have another go at this dress, which, I confess is still hanging on a hook waiting for a hem.

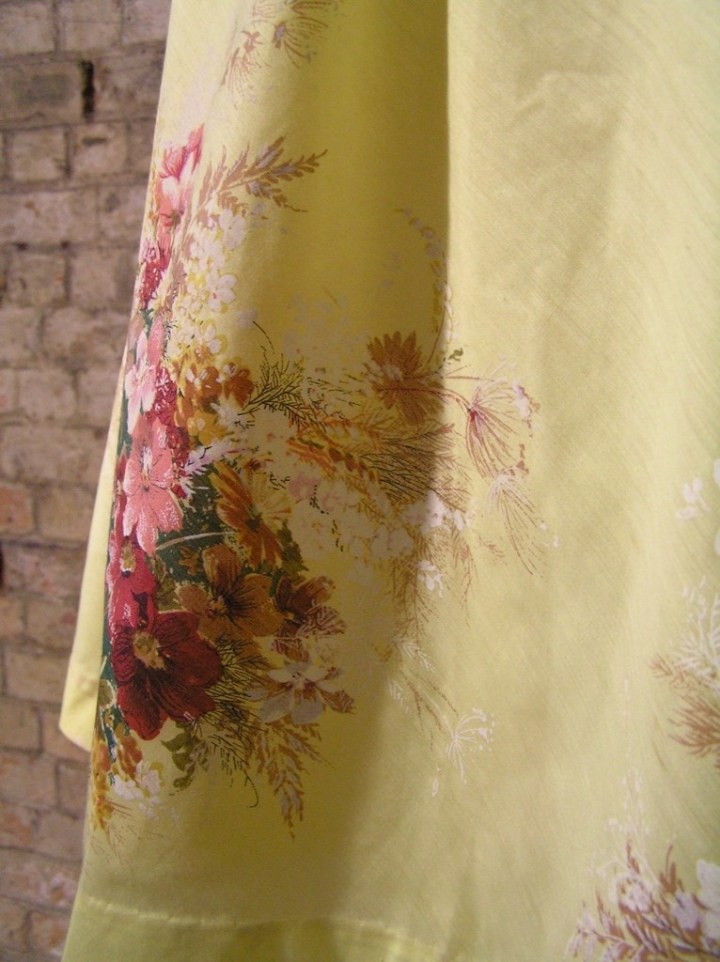
I’m trying the alternative version, the long sleeve and full skirt, I’m planning a Mad Men party next month, it’s all very exciting, and I’m working on a couple of dress options, this being the only full skirted one. I prefer a slim skirt for a cocktail evening, but in red, of it could look so lovely… so I’m giving it a go. I manage to do a bit of sewing along side Luna every now and then, while Blake naps, and here’s what I found her sewing up behind me (she works on the lowered ironing board).

Sweet huh, I cut out the flowers on those quiet nights, and give her all the flowers, many different colours and shaped petals. While she works she tells me about how she is making her own garden inside. I am impressed with the numbers of names of flowers she knows already.
Back to the dress… I have had a couple of close calls, I managed to just fit this within the fabric, this pattern by the way is great for small lengths of fabric, with the fuller skirt I needed considerably more than the slim skirt. I walked into the sewing room to find Austin sleeping on it! Usually it’s all covered with a sleeping blanket, but I was negligent just this once.. and found cat claw snags in one of the front panels. Argh, so on comparison, the front and back skirt panels were very similar, so I decided to swap them, so the snags are now at the back, phew.

But that is nothing compared to my little mishap, late in the night, sewing, I decided to press out the seams, and get all set for the assembly next day, and, the iron was too too hot, and I melted a chunk out of the lower bodice front panel, BAD news. Couldn’t believe it. After letting it alone for a day or so I came back with a plan, I’m going to make the cummerbund a touch wider to hide it, and iron on some fusing at the back, patching it securely from the front.
Here’s the damage.

And the size of it. Oh the language, just as well everyone was asleep.

So anyway, I’m sure it will turn out well, I have had a bit of a crash course in researching my fabrics a bit more, firstly I ought to do more regular burn tests, I am slowly getting a sense of what is what, and obviously ease up on the late late sewing!
And I need to brush up on some of my fabric handling skills, most of what I work with seem to be cottons, and vintage cotton blends, this satin type fabric has been one of the least predictable fabrics I’ve worked with.
-
Simplicity 3426, the new beach frock


I feel like it has been ages since I’ve posted something complete, a whole new dress that worked out just as I imagined!
Here are a few progress photos… I tend to have these binge cutting out sessions, where I cut out a couple of projects over an afternoon/evening, including facings, ironing, marking and pinning darts etc as I go, then I have a day of zig zagging edges and stay stitching, sewing darts…. this seems to make the assembly happen quickly – instant gratification! So, here’s this number all ready to go.

I picked this fabric up at the local (dream) op shop, it’s a cottony feeling fabric, with sideways stretch, and was $8 for three meters, so quite a good find, I have enough to make a pair of shorts too (wohoo). This is how it happens, there’s actually more room here than it looks! Zig zagging the fabric edges here.

I had to do a bit of last minute adjusting with this dress, and added an extra piece of fabric when I installed the side zipper, it was just a teeny bit on the small side, I think being stripy fabric it worked ok and is not too obvious.
The skirt is also not quite as full as intended, mostly just so I could have enough fabric left for shorts, so maybe about 10-15 cms less. Overall, I find the fit to be pretty close to just right, though I gave a little more length on the shoulders, about 1 cm on each bodice piece. I also added the waist band instead of making a belt as this works well for me with full skirts.
I had to sew the waist band on twice! Tthere was a bit of slippage, when I was gathering and basting it.. oh, so much extra work, but it went alright in the end. This is my second side zipper too, and now I think I love side zippers! Here’s me hemming it, hmm, got distracted by some child or the jug boiling for tea and what do I find?

Austin making the most of a nice sunny spot. He targets my sewing. He’s all, “The kids are asleep, lets just cuddle up and watch a movie or something..” I’ve ironed this about 5 times this week! But now it’s all done, will try and get a photo on me, but you’ll have to put up with these ones for now..
Close up of the illustration.

And the finished frock.

The skirt looks better on, a bit fuller, the fabric is just the right weight to pull off the full skirt, just.

This is the side zipper, here’s a close up, where I added an extra piece.

Not too bad, I think the stripes were on my side… I have had a bad run of misaligned zippers lately, but have a new tip from a clever sewer for the next dress length zipper. I struggle a bit with the bulk of full skirts waist bands, do you have any tips? I’m thinking next time to sew a piece of fabric the length of the zip and attaching the zipper to that… With this one I cut back the seams on the inside, but I still get a bit of pull, but maybe that’s the way with invisible zippers? That’s what I’m using most of the time.
Here’s that lovely low back… I thought the brown and the stripes might be a bit dull, I don’t really wear brown.. But I do like it, I think it worked well. And I think I’ll have to make a more summery floral one up next.

-
Simplicity 1720, almost done!
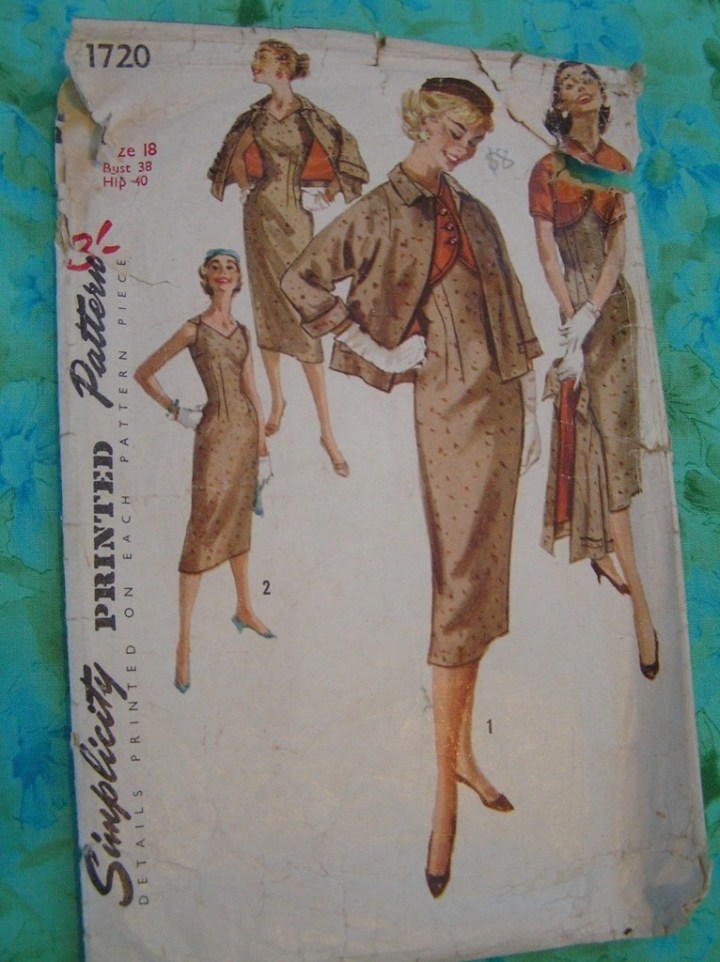

I picked up this unusual pattern at The Vintage Textile Fair a couple of weeks ago – I loved it, look how happy this dress makes the woman who wears it! Not quite what was recommended on the pattern, I’m using a lightweight printed cotton that I bought at Fabric a Brac. Another minor issue is the pattern is size 18, I most often use a 14/16 vintage pattern, so I’ve had to make more alterations than usual.

I thought I’d make up the dress, I have enough fabric for the jacket and the bolero, but will see how it all turns out, I have a co-ordinating cardy, so that may suffice for now. The fabric:

Austin The Cat busted sleeping on the dress after I forgot to cover it..!

Adjusting the top bust darts, I also had to take about 1 cm from each of the center back panels (thanks to mums help with this) as well as run it in a pinch on the sides, I also feel the skirt is a touch too wide, though will see..

It’s all complete and waiting for a hem, them we’ll be done. I have had some confusion over the split, or vent as its called in the instructions. At a bit of a loss, it seemed a very chunky way to finish it, so I improvised in the end.
This dress involved a couple of new techniques, a side zipper, which I do quite like, until now I’ve used back closures, mostly because I have been finding final fitting tricky, and it seemed the easiest way to finish if I may need to make any adjustments.
Also, the princess line darts, which I also really like, and I think this dress was economical in fabric use, just three long panels, I know I will make it again, oh and I also the detail on the straps.
-
Simplicity 3107 progress…
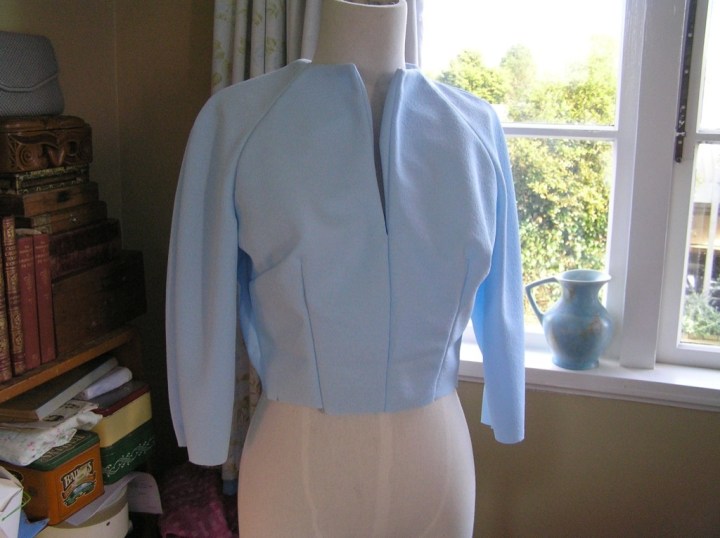
I love this dress, I’m still completing it, I have had some troubles, mostly because I’ve done some weird things, so mum told me, when I asked her for some help fitting the three (yes,three) dresses I’ve been working on.

I kept looking at the bodice on Lorna thinking, ‘WOW’. The colour is stunning and it’s such an unusual cut. I have had a little trouble with the collar and getting it to sit right, and I think it’s sorted now, also I’m confused about how to create the ‘vent’ or split at the back. Will get to that on anther post.

Beautiful huh.

I inserted the zipper, and invisable one, TWICE and it’s still doesn’t line up. This is the first infuriating attempt.

Drove me mad this one, as you can see, it was one centimeter out, I want the zippers to join the dress perfectly, but I can usually live with a few mls out.. this oh, it’s my worst! The second insertion was better though still wonky… I wanted to finish this dress to wear to Home Sewn, but in four days/nights of sewing between busy times with the kids, I needed it all to work perfectly first time.
Some other thoughts, the fabric is great to sew with, but it does stretch a touch, and I think that’s possibly where the trouble with the zipper has come from, it doesn’t need overlocking or zig zagging, wohoo, so that saved time. But, I’m worried about getting it dirty or snagging it.. also I was getting a little static charge when trying it on and off, exciting I suppose. But not a dress for a hot day!
-
Home Sewn!

I went to see Home Sewn last week, a pop up exhibition put together by the folks at the New Zealand Fashion Museum. It was such an enjoyable outing! I took a few photos, I wanted to photograph them all… but here’s a wee taster.

The Nathan Gallery 42 Customs Street East, Britomart, Auckland. September 5 – 26, hours 10 – 5 daily.
Have a look at NZ Style Collective post here for many more lovely photos, including the fabulous opening night!

Put together by the talented people over at the New Zealand Fashion Museum and only possible because of the generosity of the owners of the dresses, this is SUCH a good show, and you must see it if you are a sewer, love fashion, or are a bit mad about vintage frocks and social history like me.
Some more pics…

Cool old notions in cabinets…

Including the ‘Pifco’ Trouser Presser, even a man can use it!

I would have liked to have a nosy and see what the finishing is like (perfect I’m sure!) on the inside of the some of the frocks. So much skill represented in one gallery.
Yes, I’m going again before it ends!
-
Simplicity 3107 in blue Crimplene

This is my most exciting dress making project – I have had this small piece (not quite enough for a dress… or was there?) of Crimplene forever, and have had a couple of failed attempts at tiling other patterns to fit it, but then I grabbed this little number. Also tricky is that there are two stains, on the fold, which I have been unable to remove, so that excluded placing skirt and bodice pattern pieces on the fold.
The pattern pieces are all long and narrow if you can make out the sleeves, raglan style, from the slightly blurry photo.. so it worked perfectly, I am going full length with the skirt to see how it looks. I have a good length that I usually prefer, am going longer this time, with version two, narrow skirt and long sleeves. And, yes I know I have three other outfits cut to sew, but I do have a sew along booked next weekend so, I’m wanting to be prepared.
Here’s how the layout worked:

See, phew, just right.
Austin The Cat, my constant sewing companion, he’s thinking, ‘Wow, yeah that’s great. So I’ll just wait till you leave the room before I sleep on the fabric. And leave the heater on.’

-
new dress making project, Simplicity 5792
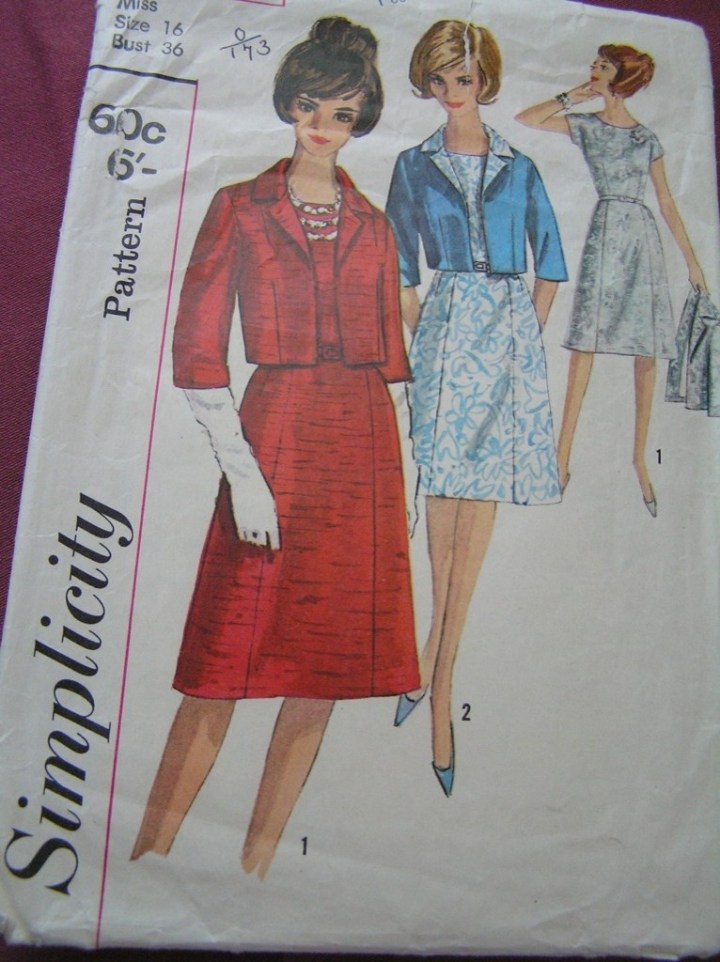

My latest new project – I have spent my alone moments this week speedily (carefully) cutting out, my new sewing room has plenty of space for my work table, oh I’m SO happy and the sun just pours in (I have cut out fabric for a pair of trousers, I tested the pattern ages ago, but I’m yet to post the finished photos.. so I’m not sharing here, yet).
But this little number is a newish pattern, and I’m using what I think is some curtain fabric, I only suspect it is curtain fabric, because it came from my mum, and seems identical to a long winter curtain I have, which also came from my mum. I would describe it as a pale maroon colour and is a medium weight woven fabric, with just the slightest sheen to the right side. I don’t think it will need lining, it feels nice to touch.
I usually work much more cleanly and carefully than this photo may show! But it may give you an idea of the fabric colour.

As you can see, I’m finding my old books to be excellent pattern weights!
The dress is really simple, and I think will be quick to put together, I have made no adjustments, as I think it may be slightly on the larger-than-I-need side, and I’m keen to just make a new dress! The skirt looks nicely shaped, it is made up of a center panel, to side/front pieces and two backs (as usual). Really straight forward bodice too. I hope it all comes together well, I don’t have quite enough fabric for a matching jacket, though I could line the collar (as per version 2) and maybe another detail I’m sure.

I also approximated the skirt length before I cut too, I find most vintage skirt lengths, so far at least are too long on me, look at them all stacked up, sigh. Now, once I get all the overdue income tax done, I’ll be able to get into sewing!

Thoughtfully, a previous owner has noted ‘side’ on the side skirt panel, I love notes that go along with using older or second hand patterns.

-
the new sewing room
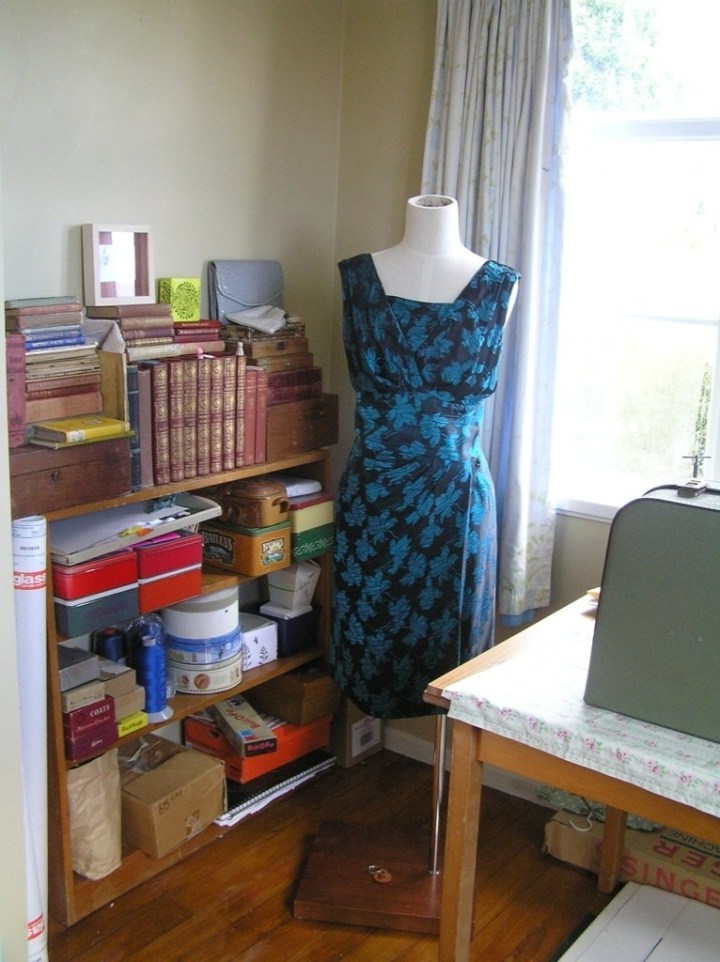

So we’re one week today in our new house… slowly, too slowly, the sewing room is taking shape. Lorna is wearing my most favourite (not made by me) vintage frock, and most of my old books will be hanging out with me now too…

The Bernina, is not quite unpacked, but how’s this for a lovely view?

Luna wants to make up one of these dresses…

This is a good sized room, and has large wardrobe! Packed just now with some boxes of fabric and boxes of purses and other market goodies. AND a small boy.

I feel as though this will be a more permanent home, and look forward to many hours sewing here. Eeek. Can’t wait.
artist, writer, curator, mentor


