-
Eeek. New patterns.
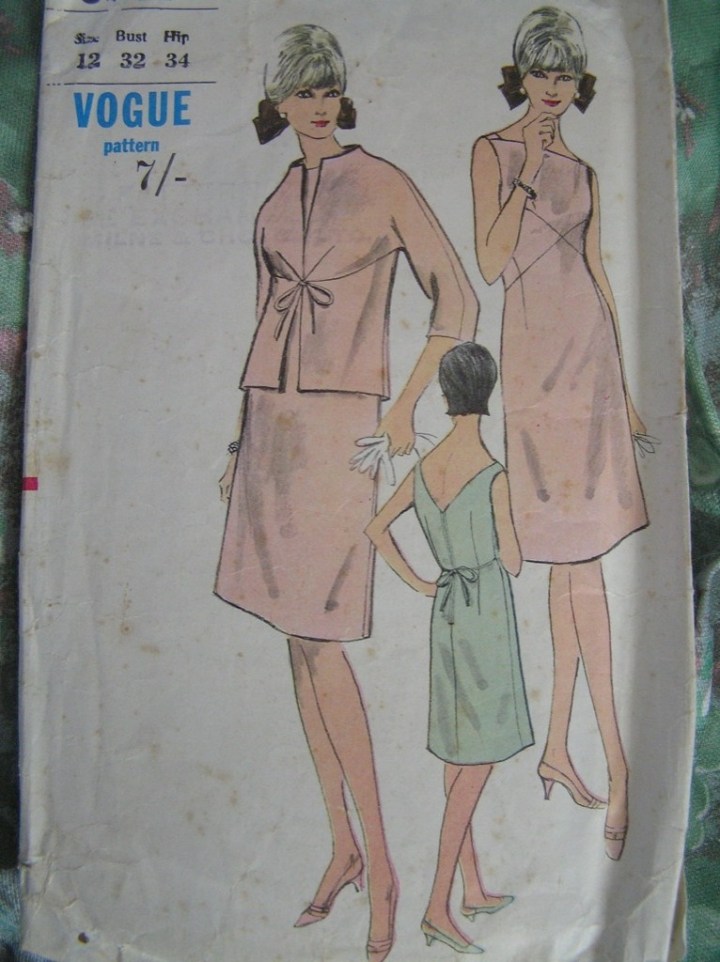
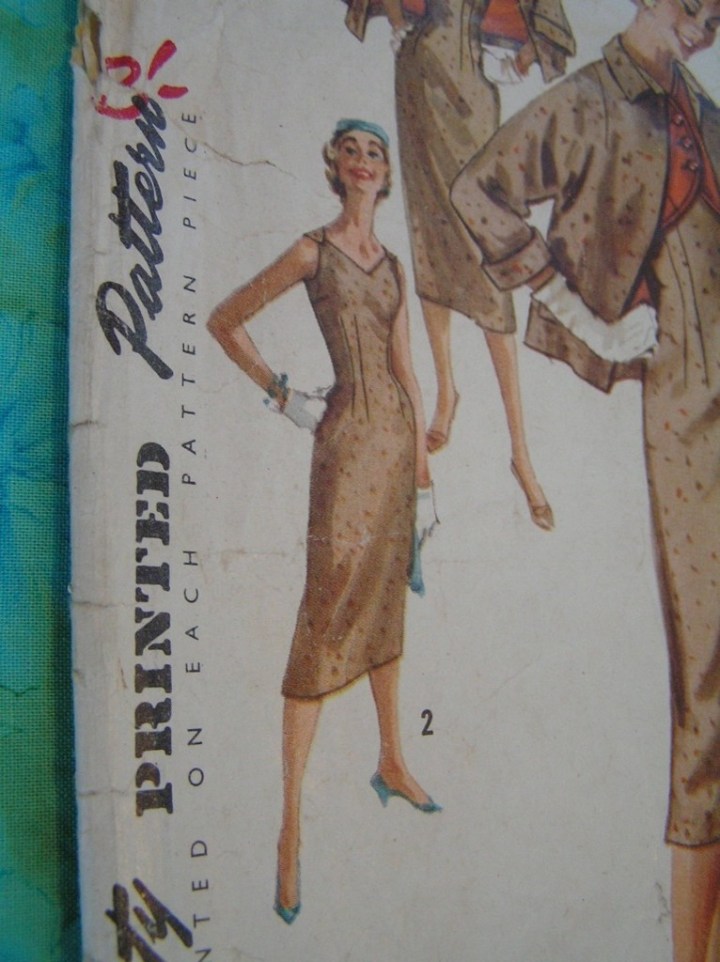
Isn’t this fabulous?

And this? Just look at all those options!

And this, it has grown on me, and I think I love it too, version two, especially.

This one is very pretty, nice concealed pockets.

This is a very classic 60s vintage dress, version two has a nice variation with the waist band.

Version two of this dress is nice – I like the back, but I’m not sure about the fullness in the skirt front!

Last but not least, with summer coming up, I’ve been looking at swimsuit patterns, so this was a good one to come across..

Where on Earth to start!?
-
Indecent exposure: Breastfeeding and Porn

Rebecca Short and I are excited about this event we’re putting together as part of The Porn Project, a fringe art campaign happening this month.
We are really interested in hearing your thoughts on breastfeeding and Porn, why are women who breastfeed in public walking a fine line between meeting their baby or child’s needs and showing a bit too much breast? Why do women feel pressure to be discreet and breastfeed with modesty despite the excessive use of breasts in media and advertising?
We are lucky to have Barbara Sturmfels to facilitate the discussion, so please come and join us for a coffee on Monday the 12th of August at Alleluya Cafe in St Kevin’s Arcade, Karangahape Road, between 10am and 1pm. Discussion from 10.30am – 11.30am. There will be time after for more discussion.
This is a mother friendly event, babies, children and partners are welcome.
In the media, we read things like; a breastfeeding woman might convey “the wrong image” about an eating establishment (source), and “…many mothers would breastfeed in public, they felt reluctant and uncomfortable, citing reasons such as “people stare as they walk past” and “the stigma around it”.(source)
Please note, we’re using art to walk a line that is collectively neither ‘pro’ nor ‘anti’ porn, but that instead celebrates diverse desires, bodies, sex and erotica, while at the same time refusing misogyny and racism – whether the repetition of narrow ideas about ‘normal’ sexuality, or explicit gender- and race-based violence.
More about The Porn Project:
Karangahape Road
Tāmaki Makaurau/Auckland
Aotearoa/New ZealandAugust 8-18, 2013
The Porn Project is a fringe art campaign. For these ten days we want to get people talking about porn, and we want to do this in ways that are creative, grassroots and participatory.
We’re using art to walk a line that is collectively neither ‘pro’ nor ‘anti’ porn, but that instead celebrates diverse desires, bodies, sex and erotica, while at the same time refusing misogyny and racism – whether the repetition of narrow ideas about ‘normal’ sexuality, or explicit gender- and race-based violence.
We will be based on and around K’Rd, occupying spaces in Method and Manners, Ironbank, shop fronts and the street. The show is set to be broad and greatly varied as our 50+ contributors respond to issues and elements around porn. We will have paint, poster, video, illustration, dance, guerrilla action, talks, installation, participatory and live performance and films, for all y’all senses and sensibilities.
http://the-porn-project.tumblr.com/
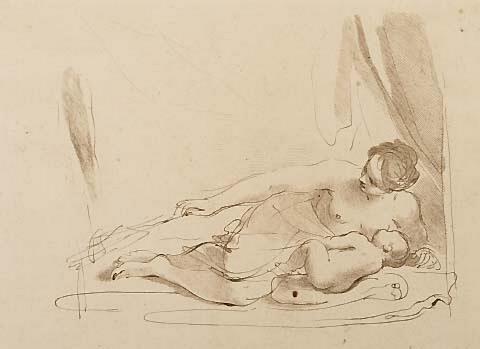
Cover image credit: Francesco Bartolozzi Woman Suckling an Infant (source)
-
Simplicity 4693 finally… finally complete.
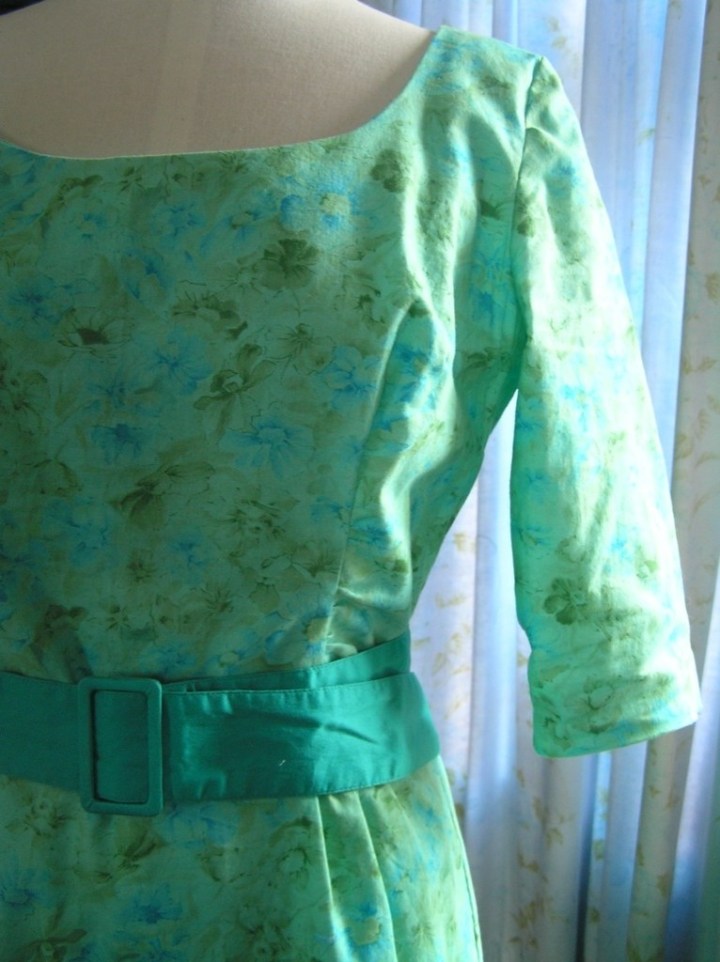

Yet another dress finished, I have a backlog I need to photograph and share… This is Simplicity 4693 in a lovely light weight printed cotton I picked up at Fabric a Brac a year or so ago. I had been sitting on this lovely dress pattern for some time, I had almost six meters of this fabric, so plenty for another project (or two!) I used it here, for Simplicity 1720. This belt I picked up at an op shop – I think it is close enough to the fabric print, but I’m not sure if I like this dress with a belt, especially so wide a belt. The gathered bodice and skirt are a bit lost with the belt, I think those gathers are worth seeing!

Isn’t that just the most lovely pattern illustration you’ve seen? I had some little problems with this dress…. namely unexpected alterations when I wasn’t around, one of the risks of sewing with small children. I found Luna had made some cuts in one of the front skirt pleats, the sleeve and skirt hems! Shock and almost tears, she was a bit worried about it, I see what she was thinking, I often put my garments on my mannequin to clip curves inside and make adjustments, I think that’s what she was helping with. Heartbreaking none the less! To repair the garment, as the fabric is prone to fray, I used some iron on facing behind the pleat, and had some colour co-ordinating fabric pencil, I coloured it in and ironed it, hoping to fix the colour. I had to make the sleeves shorter than I wanted, but the skirt hem was ok, it was going to be shorter anyway. Sigh. It’s alright in the end.

Here it is! Short days and a busy Rob means I don’t get much time to have photos done, one shot and the camera battery went flat, so you’ll have to be happy with photos on my mannequin. I had some fitting issues with the neckline, it gapes, at the back as well as the front, I made some extra darts at the shoulder back neck line, which don’t look so good, but help the fit.

I made a toile with a slightly different fabric, and cut this out before I learned about the hollow bust adjustment that I need to make for a better fit, this dress has such a wide and low neckline, I guess it makes the fit even more problematic. I might have to have a bit of a play around with the fit and should have it ready for spring, I do love it and can’t wait to make it again.

-
Academy 4832 slim skirt complete!
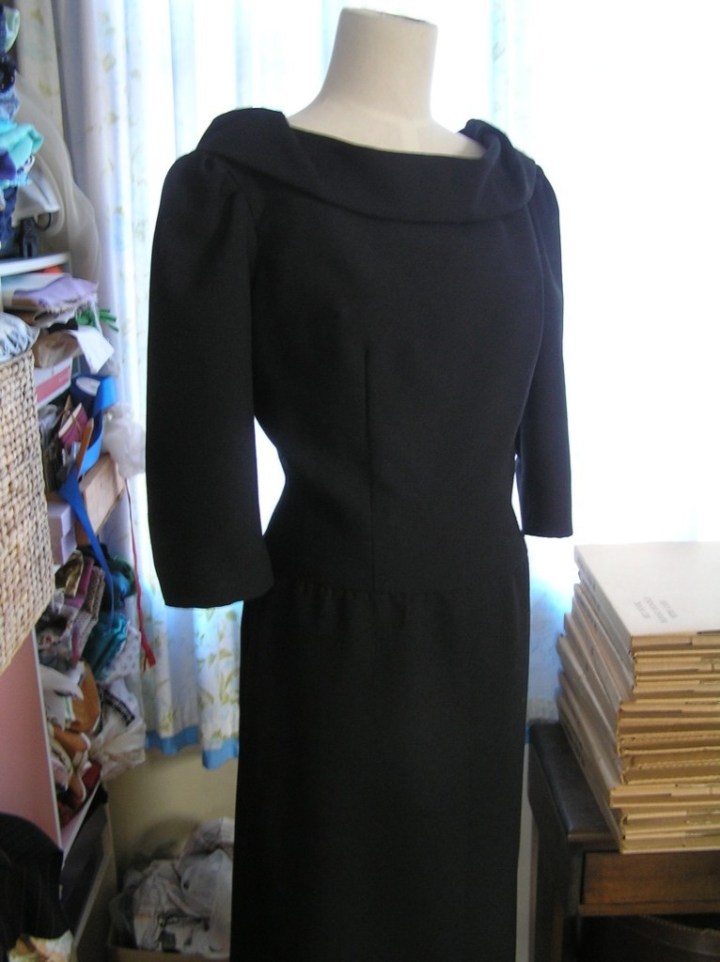

I started this project ages ago, put it on hold when I ran into some technical difficulties and now, it’s finished! I’ve worn it out a couple of times and I just love it. Above is the front view,

On me the bold collar is well balanced, and doesn’t seem to dominate the garment as much as it does on my mannequin, the dress is very close to the illustration on the pattern envelope.

With this dress, I decided to try two new skills, lining and interlining. When I found the fabric had a fairly open weave, it seemed like the right project. I had assembled the bodice by then so my plan was to line the bodice and interline the skirt. I also had a go at Hong Kong seams, I was worried it might create a bit too much bulk, but it was fine, and they look SO good. See? Black on red looks hot so that probably helps!

More photos of the lining… This was pinned in place here, and the waist was not joined to the skirt.

The back..

I had some issues with the bodice lining – I was unable to fit it perfectly to the inside of the dress, there was quite a bit of pulling across the bust, which impacted on the fit around the collar, and drove me mad, as it fitted perfectly before I lined it! I think the bulk of the collar, and the thickness of the fabric across the top may have contributed to the imbalance. I was unable to solve the fitting problems and did not have enough fabric to make another interlined bodice, so I made a couple of tucks just under the collar, below the front shoulders. My mannequin is a bit slimmer than me! And the skirt fits so well, it looks a bit like culottes here, but it’s just the split. Just look at that shapely collar, I love it!

-
Weigel’s blouse mash up complete!
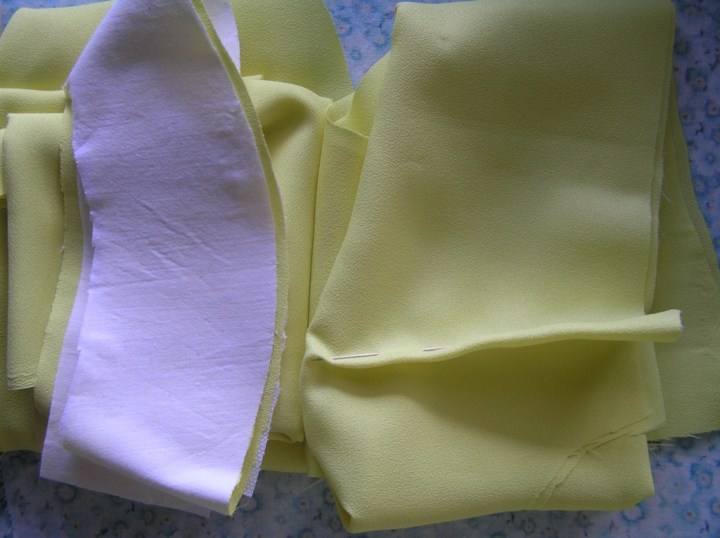

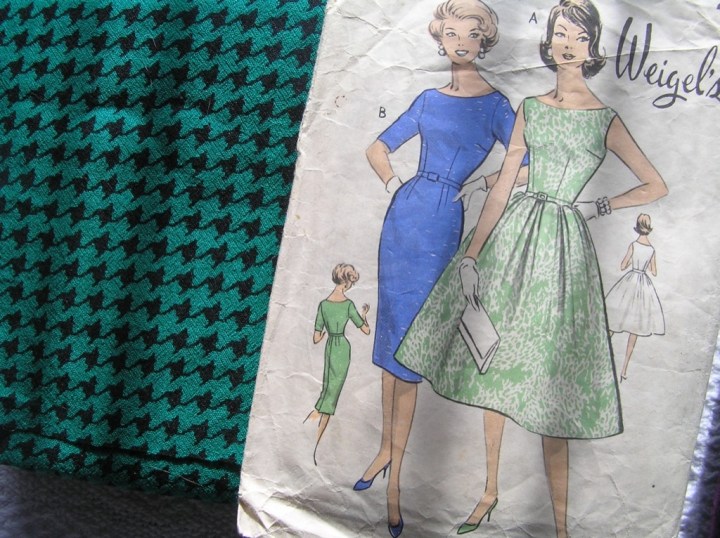
I love as fast turn around on a sewing project, and I love it when a more experimental idea works out well. You might have seen I had this little blouse all set to sew in an earlier post, here’s the pattern envelope and fabric..

I used a lemon yellow crepe from my Nana Joy, which is a delight to behold and work with – except that it is a touch on the sheer side. From another dress project, I discovered that this dress has possibly my all time favourite neckline, and after going through my too-small-for-a-dress fabric stash, I thought I’d have a go at making a blouse from the bodice. Keen to have a the top reach a little past my waistline, I grabbed this other favourite dress pattern, which has a dropped waist – just my size too.

If you’re new to combining different patterns here’s what I did…
First, I placed the two front bodice pieces together, checking dart placement, arm hole position, and anything else structural that may make them incompatible. They were essentially the same size with the differing neck line and obviously length as the main variation.
With the shoulder seams together I placed them on my fabric in this case, both front and backs went on the fold, played around until I was happy that they lined up and that I have enough room for the extra length. The Academy pattern has a back closure, while the Weigel’s has a side zipper closure, so I made allowance for this too. The adjustment I was making did not affect any facings, so it was fairly straight forward, I removed the Academy bodice piece, weighted the pattern and cut the upper bodice to where the two bodice piece meet (I also make a hollow bust adjustment at this point). Then, replaced the second longer bodice panel slipped the Weigel’s bodice out and finished cutting out. I used the same process for the back bodice panel.
Easy really. I only have a couple of progress photos… I get a bit carried away when I’m inserting sleeves, do you? They have to be perfect. Oh and I went with the side zipper, I used and invisible zip from Nana Shirley’s stash.

I left the front and back vertical darts open, I haven’t quite figured out what I’ll do with them yet, might just ease them down, at the moment the blouse tucks in fine, left out, it looks ok, somewhat like a peplum.

Front view… see, I haven’t quite resolved the front darts, which look a little like pleats from here.

Back…

Overall, I’m very happy with this, I’ll probably wear it tucked in, and yes, it does need a better press!

I’m not sure how to avoid the neckline facing showing through, other than trimming it back, which I don’t really want to do, I used white iron on facing, I think perhaps nude/beige may have been a better option. Any tips?
-
The wonderful world of wearable art

I’ve been a bit absent from my blog lately, due to this business of life, but also I’ve been working frantically to complete two garments for this year’s World of Wearable Art in Wellington. I mentioned it here, one of the conditions on entering is that no images are published until after the show season, so this has been one of those secret sneaky projects that I’ve been dying to share for ages. And so it all turns out that my entries were, unfortunately, unsuccessful, STINK. But now I can write about them and get on to some other possible ventures for them.

So here you go!
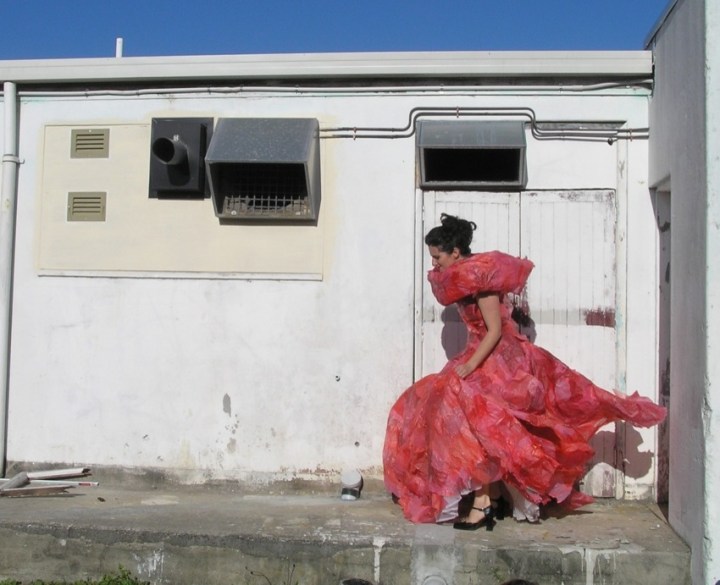
This little number is Hydra, she’s made out of Warehouse plastic bags, repurposed sheets and tulle, I managed to put this baby together without buying any new items, I did find a vintage long petticoat to wear underneath at an op shop, so that makes the materials cost $8. Choice.

This garment was a bit of a wild card for me, I was looking at a number of different forms, but went with a structure similar to those that I have created with my hyperbolic crochet. This made for a very full skirt, the bodice is firm and shaped to conform to a female form, with a high collar. It moves well, and sounds great. Not that comfortable to wear though.
I put together a few words about the concept behind Hydra, here:
Emerging from a hydrothermal vent, Hydra explores her domain… Formed by my exploration of hyperbolic undersea organisms, Hydra is a hybrid of deadly plastic and organic motion.
Hydra is also the result of my experiments with plastic Warehouse bags, beginning in 2004. Her structure, both ridged, fragile and free flowing, reflects the varied polyps and coralline organisms that inhabit the hidden undersea world. A world of deadly predators on a microscopic scale, a world that is being infected by human waste, nano particles and degraded plastics.

The other garment I created is Coralline, I spent months making a beautiful woven mat when I was at art school, all those years ago, and once I had the guts to cut in to it, this was really fun. I made a ‘cape’ which is very structured, as an accessory.
I played with the woven structure to fold some big box pleats, which I think worked so well, giving more of a sculptural form.

Here’s the other side..

The bodice is a lined boned corset, with a zipper at the back. Here’s that full skirt.

Here’s the front, with the cape…

Coralline is also made from plastic bags, Foodtown supermarket bags this time, repurposed bridal fabric, I also picked up a second hand bridal petticoat for this one too.
Some words on the inspiration behind this garment:
A shimmering fantasy fashioned from post-consumer waste, the fabric used to create this garment is woven out of plastic Foodtown bags, collected in 2004, woven into one continuous piece of material, which will probably outlive the fabric lining of the bodice!
Coralline embodies my love of dress making, celebrating my whakapapa… my mother, and grandmothers, and their creativity. It is this that has inspired my own journey into dress making, fashion and an obsession with fabulous textiles.
Structurally, it is an homage to two of my favourite designers, Christian Dior and Alexander McQueen artists who embodied luxury, excess and the extremely refined and sculpted female silhouette.

So I’m a bit gutted that I didn’t get a look in, it was a lot of fun, way, WAY too many late nights. So good to be working towards something creative again, and can look back on some new skills that I applied in making these garments, as well as overcoming a few technical challenges. A couple of years ago, when I started out seriously making my own clothes I never would have imagined I’d take on a challenge like this, not to mention the fact I did get it all done, and by the deadline, madness really.
As they say, one door closes and another one opens, so we’ll see what’s a head!
-
Weigel’s 2039, complete, in time for Autumn

Perfect for Autumn, I managed to quickly finish this baby off despite the deadline for my WoW entries looming. I cut it out ages ago while at mums’ place, well before the temperatures dropped, so it’s great to have something warmer to wear when I need it! I went for the full skirt with long sleeves. Here is is, almost complete over an oversize petticoat, awaiting the hand sewn hem.

It was so easy to make, I made only a hollow bust adjustment, folding about 8mm out from each side and making a minor short back and sway back adjustment. It has a side over lapped zipper, which was new for me, and I added a waist band rather than making a separate belt, as that seems to be a good look for me, and saves having to make a belt!

There’s so much I love about this dress, the neck line, is so simple, it is easy to wear and very comfortable. Some of my vintage sewing projects have resulted in lovely dresses with barely any wearing ease, so this is one of my most wearable so far.

With the side zipper, the back of the bodice, to me, feels like more of a feature, and I cannot wait to make another version of this dress. Next time, I’ll take a little out of the sleeves, which feel a little baggy, and I’m planning to make a slim skirted version next, with this dress, I found the gathers very bulky, if making the full skirt again, I’ll take extra time to pleat them, this is another reason why I find adding a waist band helpful, it has helped to flatten and smooth them out somewhat.

Another minor issue, the skirt looks great with a petticoat or two under it (I have to replace the elastic in my two… just notime at the moment!) sorry no pictures with the petticoat, yet. It is also slightly sheer, so for modesty I suppose I should make an effort. Though I have been wearing it out already, for winter it seems to go well with my 60s/70s boots, no doubt I will have to whip out some heels to make it more elegant another time.
This is an idea for another dress… I have about four meters of terylene in a vibrant purple, it has some stretch, so I’m thinking I’ll play around with it first, might be able to omit a zipper, maybe.

-
Cape, skirt and trouser ensemble.


I’m putting together a couple of outfits, matching separates mostly, to wear over the cooler months. I’m getting a lot of use out of a pair of trousers I made using this pant pattern (sorry no photos yet..):

I thought I ought to make a couple more pairs of pants, get a bit colourful even!
So here’s the plan, make up this cape (it’s cut and ready to start)..

And this skirt from this sweet suit – I might make the suit top if I really get into the matching separates thing.

My fabric is a delicious red wool crepe, quite light weight with a nice drape to it, so I think it’s just right for the cape, and will also work nicely for a slim skirt and the trousers. Not too heavy, so it should be perfect for autumn. I also have a great stash of lining I was given, red and pink to use for this project.
-
Academy 4832 full skirted version.. complete!
This is probably the fastest turn around I’ve had for a sewing project for a long time, less than a week from cut to wear.

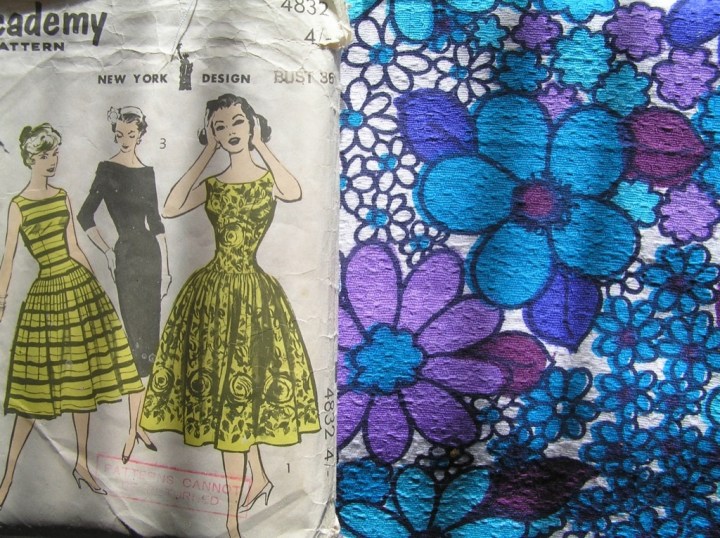
This fabric is an amazing vintage bark cloth. I knew I could create a stunning bodice with this fabric, but was worried the skirt may be bulky with this fabric, but it turned out well.

Ready just in time for Luna’s fifth birthday, yesterday, Rob snapped a couple of finished photos.

I hesitate to use bold patterned fabrics for garments that incorporate beautiful paneling, gathering or pleating, sometimes those details are lost. I think this happens here. I created the pleats in the skirt, rather than gathering, the fabric is too heavy, and the fabric takes the pleats really well.
When it’s on, and you look closely you can see the pleats. Also, I had half the fabric I needed for the full skirt, but didn’t want to make another slim skirt – I have the long slim skirted version of the dress just waiting to have the lining attached and the sleeves and skirt hemmed.
A number of my vintage patterns have a flat panel over the midsection, with gathers or soft pleats starting where the bodice darts meet the skirt, I thought this would be a nice touch and work with a not-so-full skirt. That and the fact I was worried about the fabric being bulky around the belly area!

I finished the hem with some vintage lace, and here is the back of the dress, I love the low ‘v’ – please avert your eyes from the not-quite-lining up zipper! I hand stitched the facing in place late in the night, and when I tried the dress on I realised it was pulling on one side – damn!

Brief pattern and project review…
Satisfaction:
Will I wear it? Yes! I love it!
Will I make it again? Yes!
Fabric choice, alternatives: Barkcloth was great to work with, I love these colours.
Technical, pattern fit: Almost perfect, so glad to be able to get a little extra help from a pro sewer! I will need to make a hollow bust adjustment along with a sway back, and short back adjustment. Then it will be perfect.
The illustration on the envelope: Very close, this skirt is not as full, but the fabric holds the shape.
Instructions and assembly: Easy, and quick to put together.
-
Simplicity 1720 finished! Photo time darlings.

So, this dress did my head in a bit, but now I love it. It has been hanging in the sewing room for a month or two while I pretend that it is not there, aaaand make six new frocks to make up for it. Here’s a close up of the fabric… a subtle floral print on a light weight cotton.

You might have followed an earlier post here. From the first post, you will see some of the adjustments I made, running in the darts on the front and back panels, and about one centimeter down the side lengths. The key issue with this dress/pattern is that it is a size 18, I most often work with size 14/16 vintage patterns, so this presented some challenges.
While I was able to run it in down the sides and sew the darts a tad deeper, I think that the straps are too wide. I have been considering adding bias binding to the edges, as in the pattern illustration, and maybe some stylish buttons. Thoughts..?
It is also going to need ironing every time I wear it!


artist, writer, curator, mentor


