-
fresh new hyperbolic crochet…
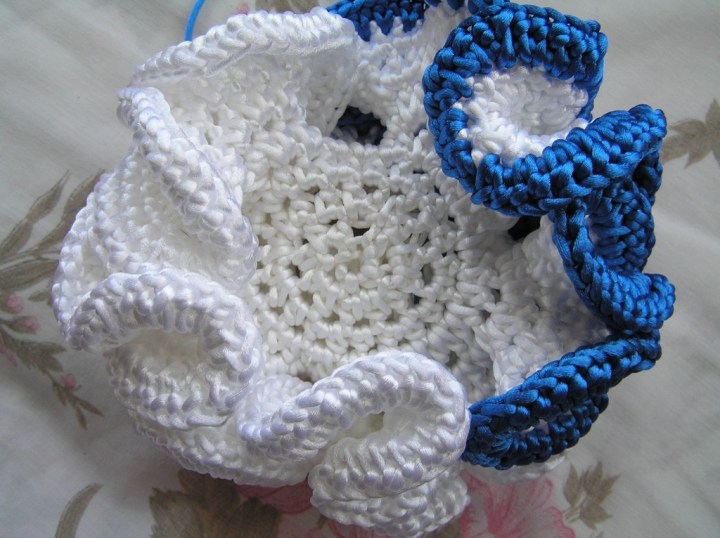

I new work in progress, I’m enjoying a bit of freedom to pursue crochet again…


This one increases every stitch so I’m getting fast results, lots of curling and it’s actually getting difficult to work with.

We’ll see where this one leads…
-
more images from Successful Dressmaking…
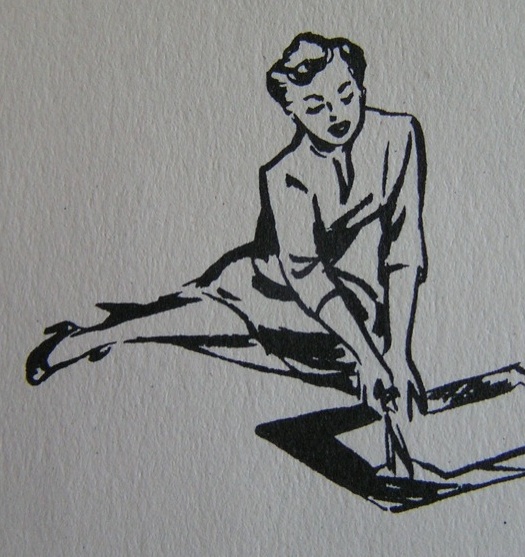

Just a couple more images from my recently acquired Successful Dressmaking book.

Love these illustrations, so simple.

All the tools…


-
Auckland Art Gallery Toi o Tamaki on Boxing Day rules.

What did you do on boxing day?

We went to the Auckland Art Gallery Toi o Tamaki!

Come on! Lets go!

Stop messing around Nancy and Iris!


The girls are all into gardening and flowers, so this work was a BIG hit. Red, by Choi Jeong Hwa, who is also the artist behind Flower Chandelier, is a stunning piece and looks great outside the new entrance. Fragile and bright in contrast to the city architecture and all that concrete.

There is also a cool art station for kids, you can play around with some fun stuff along side a sparkling Reuben Patterson wall…


Choice!

Luna checking out Len Lye’s Universe. So cool to have her experience works I’ve come to know so well.

Before all the renovation work even began there was a lot of talk about making our art gallery a ‘world class’ art space and a destination. That phrase got bandied around a lot – particularly as the cost of the project grew.
But this is a world class gallery and so worth a visit, so get along over the summer holidays while it’s quieter than usual.
-
Successful Dressmaking!
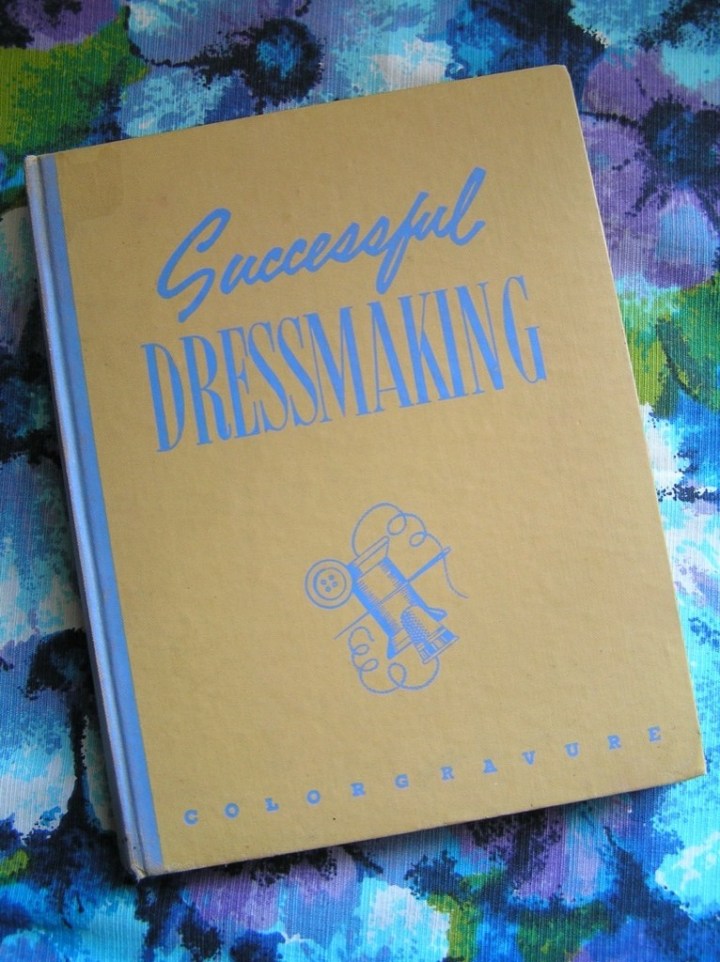

More treats from mums house!

An oldie and a goodie, Successful Dressmaking, this is my bedtime reading. I have plenty to learn, so it’s good to have a book to refer to at the moment, and I LOVE the illustrations.

These are the inside cover images…


And this one, the only colour plate.

I remember reading this when I was a kid.
-
The Auckland Art and Craft Fair is THIS weekend!
Exciting stuff, this is a big event for local craftsy folk like me, it’s a great day to get your gift shopping done, with some of the best in local talent all in one place selling their wares.
I’m pretty much all packed and ready to go, with just a couple more orders to fill, I have some goodies for you! My Cupcake Pincushion Sewing Kits have been popular with buyers on Felt.co.nz, and my new Hanging Strawberry Sewing Kits have been a hit for people looking for an activity for a child or craftsy friend… I’ll have plenty available on the day, all ready to go!

Cupcake Pincushion Sewing Kits…

A kit box for Hanging Strawberries…

See you there!!
Saturday 10th December 2011
11am to 3pm
Aotea Centre, THE EDGE
Auckland Central
Gold coin entry donation -
Simplicity 3461 complete!
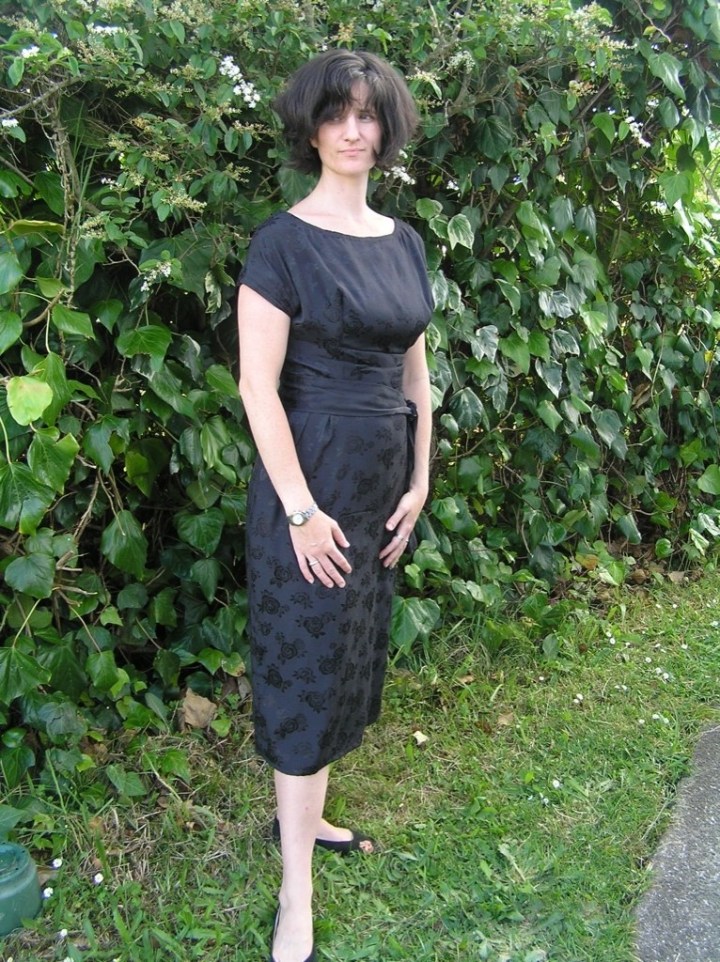

(Yes, I know, I should have pressed it properly… but I may not have had any photos til next year!)
This maybe my favourite dress. It was far easier than I thought it would be to make, though the fabric was tricky to cut accurately and moved somewhat no matter how many pins I used.
I made the largest/tall size on the pattern, including the longer skirt, I also allowed extra fabric on the front top and skirt panels (on the center fold) which worked ok on the skirt, but gave me more fabric than I needed in the bust (this was based on my estimated adjustments considering the my measurements and those noted on the pattern) and was fairly close. However the next time I make this one I will get a better fit! I also had to increase the darts in the top considerably, again I think this was because I allowed a little extra while cutting.
This the first dress I have made that is in two sections, a top and skirt, and it was not too bad, just a bit tricky lining it all up in the end, but I think this gave a good and comfortable fit in the end.

I’m trying to use what ever I have at hand as far as notions go, and so this baby is fitted with a hot pink invisible zip (which is mostly invisible I have to say – phew!) and as I do not have a suitable belt buckle I made the belt longer and tie it on the side (which hides the pretty pleats a bit though, so I am looking out for a buckle to suit).

I was a bit unsure of the style, as far as how well it would suit me, and the fabric was a gamble, it was not the first choice, though I’m happy now! I learned I need to slow down a wee bit, I took the time to carefully finish all the facings in the top, however I neglected the inside raw edges in my enthusiasm to complete it, so need to address those before I’m leaving threads behind me wherever I go with it.
Here are those lovely pleats…

On to the next dress!
-
Simplicity 3461 getting started
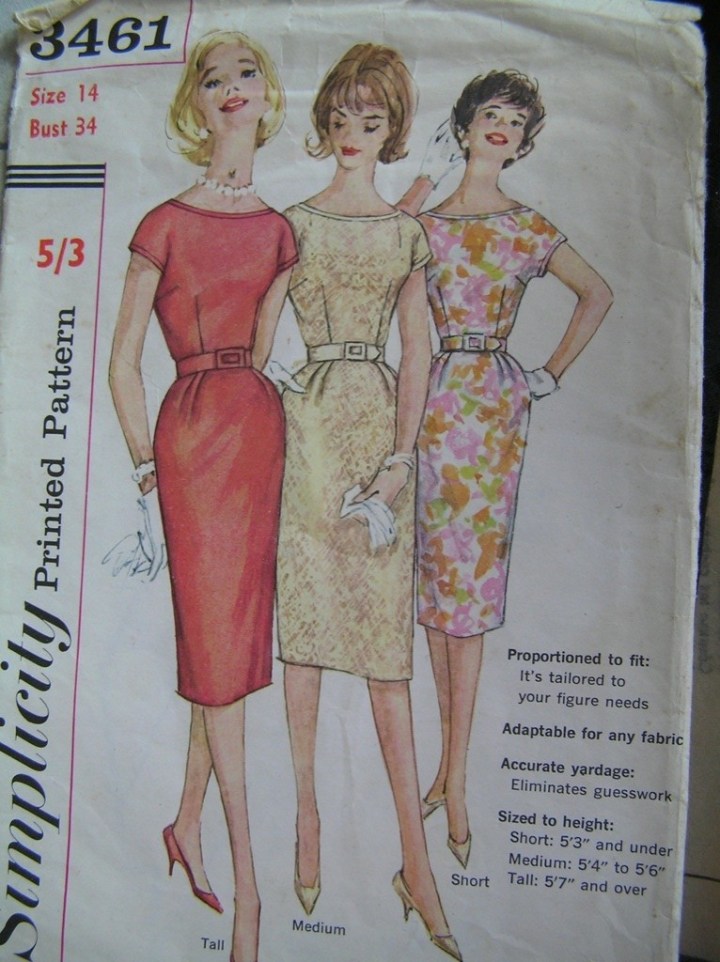

This is my current we sew retro project, it’s a bit scary! I hope the fit is good, and I’m a bit worried because I don’t look like one of these women, what with those skinny ol’ legs and red lippy.
Here’s the fabric, which, I’m sorry to have found to be a bit of a slippery kind of poly cotton, it looks lovely, and I think I’ll be ironing it every time I wear it. I chose a pink zipper, because I’m going to ace this invisible zip again, and it was in the stash that came from my nana too.

I’ve been extra carful about the notches and ironing this baby with almost every stint of sewing, and I’m backing all the facings too.
-
Simplicity 8702 vintage dress number one!

I’ve had this pattern kicking around for ages, and with this dress, I now know I don’t really suit the shift style…

Here’s all the bits, this one even had a punch card, how old school is that? First time I’ve pulled one out before. This was a new/unused pattern that I found in an op shop.

I chose version three, the center one, and it was only after I found the perfect fabric that anything happened…

I was unsure about the sizing, this pattern is size 12 and my measurements placed me somewhere between size 12 and 16, so I added 15 mm on both the front and back panels, and lengthened the facings.

Making darts is very exciting, for me, it starts to take share pretty quickly!

One other reason (besides being a fairly straight forward dress to make up for a beginner sewer) I chose this dress is that it would be simple to modify to allow me to breastfeed comfortably. I just lowered the front opening a touch, extending the facing too.

Once I tried it on I decided to add a couple of darts in the front, it was a bit too boxy on me, mybe it would suit someone much thinner! So I added a dart on each side under the bust, all by eye and while wearing it – so I also discovered I could really really do with a mannequin, or a sewing buddy… Here it is all darted and pressed, but not hemmed…
Oh and I did end up not needing the extra I had allowed for, taking about 15 mm off either side seam, but it was probably what gave me fabric to pay with for the additional darts.

And the reverse, with the not-quite-invisible zip…

I also was a bit slack and did not using any proper facing, mostly because I could not find my stash. I managed to use one of the zips mum gave me from nana Shirley’s stash and so it was very economical…

All in all I love it, it was a big confidence booster for dressmaking, it feels very summery and I made myself! See how happy I am?

Here’s that fabric again…

-
retro top for spring
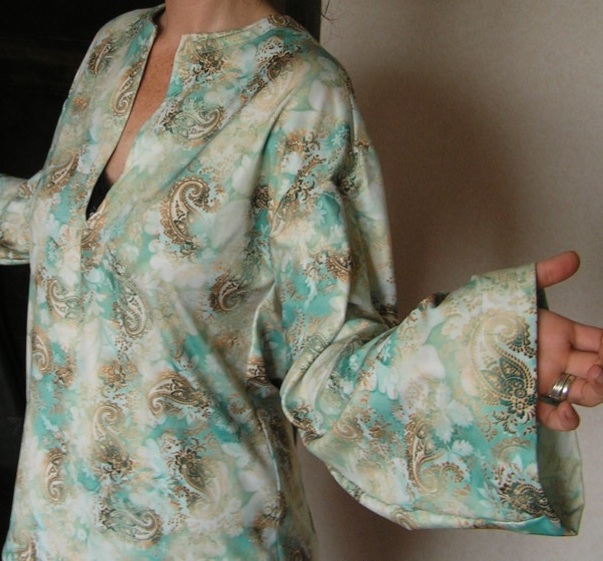

So, I’ve had this cool 70s top on the go for ages, it was supposed to be one for the autumn/spring months, and breastfeeding friendly of course.
And now, it’s complete, I’m so happy, it’s this pattern, Simplicity 8069, middle version, with long sleeves.

And this fabric, which was a little mad, because it wasn’t quite the best choice (a synthetic slightly stretchy fabric) but I soo love the print.

I learnt a lot doing this project, I’m no longer afraid of my lovely machine. I need to take more care when cutting out (this was one of those quick cut! Quick iron! When the kids were asleep..) so really clean straight edges, and making underarms and collars can take more time and care than I thought.

But I do still love it and when the kids are no longer snot monsters I’ll get into it.

I did alter the pattern somewhat, I added length to the sleeves (though I have no idea why, because I needed to shorten them!) and I made the front open lower, for breastfeeding.

I did more top stitching around the neck and bottom hem.

Some construction shots…

Sleeves on, lining up the notches… and some collar details, see the fabric is so beautiful!

I plan to make a short skirt with what’s left of the fabric.
-
New sewing patterns and fabric..
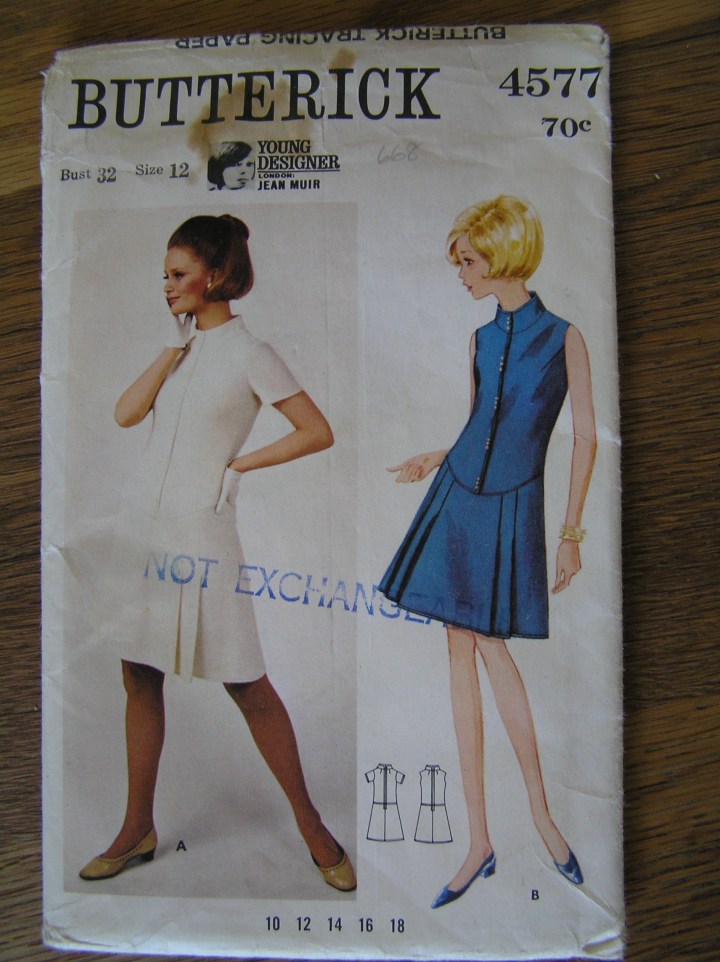

I picked up this pattern for a couple of dollars, I can’t wait to make it! Hopefully I’ll have a couple of dresses made up for Winter…. babies permitting! The designer is Jean Muir, very stylish.
Here’s a close up, the tricky thing is finding or making a dress that allows me to breastfeed, I think many vintage dresses just weren’t made with that in mind.

Cool fabric…

I’m using the fabric above for the top in this pattern below, I posted about it earlier.. it maybe a little different, but I like the colours, so it should be alright. At the moment it’s all cut and ready for me to break out the iron and get the sewing machine whirring!

artist, writer, curator, mentor


