
Working with Vintage Sewing Patterns
Vintage sewing patterns are lovely to use, and there is something special about using a sewing pattern that may not have been touched since it was packaged up 50, 60 or more years ago, or has been carefully used and looked after by another sewer. Obviously they can be fragile, and that is the main consideration with the following tips.

Angela’s tips for working with Vintage Sewing Patterns
* Store your vintage patterns individually in clear plastic bags, if damp and humidity is a problem, consider using silicone packets to prevent moisture damage
* Rusty pins and cello-tape; if you find pins have been used and left in your pattern pieces (often used for shortening pattern pieces, or for keeping small pieces together) just carefully remove (try twisting rather than pulling them out), and dispose of them, they can cause rust marks on the pattern pieces and envelopes, and cause tearing. Cello-tape often looses it’s adheasion over years, but it can leave pattern pieces sticky. If possible, carefully remove the plastic, as a last resort you may have to make a copy of the pattern piece. Do not iron pattern pieces where there is, or has been cello-tape!
* When a pattern piece has been cut, or damaged, I find the best solution is to carefully retrace the piece on pattern tracing paper, rather than cello-taping it together.
* Gently press the pattern pieces on a low heat, with your iron set on ‘dry’ (no steam)
* If the envelope is damaged or if your pattern pieces are bulky, store them in the clear plastic bag, with the pattern envelope visible, don’t put them back in the envelope as excessive handling can cause damage to both the envelope (with that fabulous illustration!) and the pattern pieces
* Consider making a paper or muslin copy of your most used, or very special vintage patterns
* If you need to make an adjustment to your pattern piece, do trace it off and adjust the copy
* Store away from bright sunlight, like fabric, patterns envelopes can fade
What do they look like?
This is from Butterick 9497, a Man Men Challenge.

An Academy 40s slacks pattern, front and back, a pocket and waistband.

Pleats marked with punch holes and arrows stamped on the 40s slacks pattern:

More complex (looking) punch holes marking a Vintage Vogue Designer pattern:
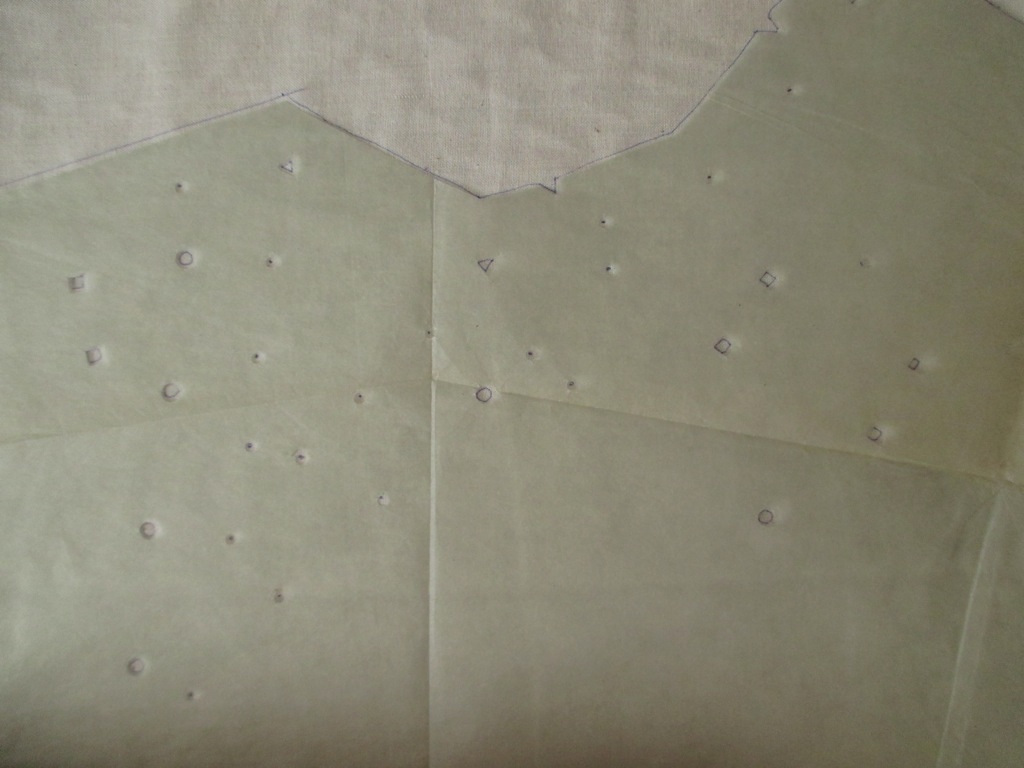
This pattern used three different size circles, squares and triangles, which mark: button hole placement, folds, pleats, notches, hem length, grain line (not shown) and seam allowance. It looks difficult, but I think it’s a good system.
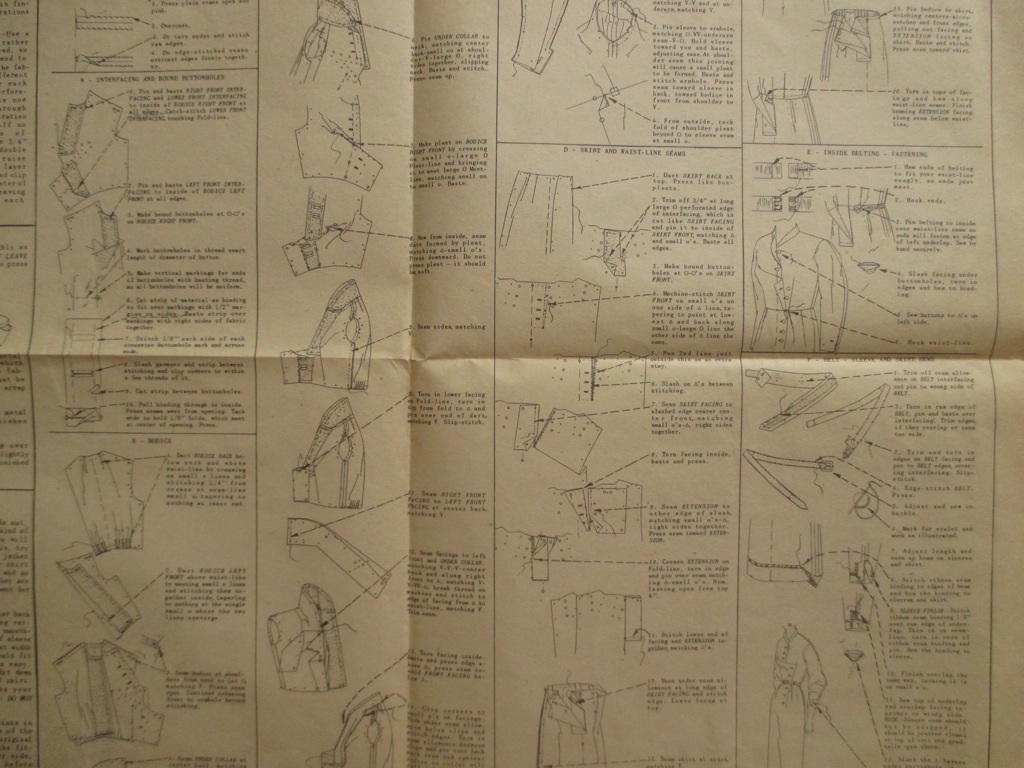
Instruction sheets – often there is only one – can look like this, from the same Vintage Vogue above:
And the 40s slacks:

I have become more precious with my sewing patterns over the years, especially with the more hard to find (and possibly irreplaceable ones) so I tend to be more cautious, and I like the process of tracing and toile making, as much as for the learning and practice as anything else.
I’m participating in the Vintage Sewing Pattern Pledge 2015, and I have some exciting and more challenging projects lined up… Will you make a Vintage Sewing Pledge this year? Go on!

Do you have any tips for working with Vintage Sewing Patterns? What would you add?

they are great tips, most which i do, and although I dont trace all my patterns – it depends on if i am going to do alterations/modifcations (trace) or a straight cut (use and put away quick), if i trace an older pattern (with the punch marks only), i decipher symbols and pen them with contemporary markings including standardising seam allowances to 5/8inch
LikeLike
Thanks for your comment, yes, I make notes on the traced pattern pieces too.
I’m glad these are useful, I remember feeling a bit intimidated by vintage patterns, but now I prefer them to printed patterns.
LikeLike